Steam screenshots are one of those features that seem simple on the surface, hit a button, capture a moment, done. But if you’re serious about preserving your best gaming moments or sharing them across communities, there’s way more under the hood than most players realize. Whether you’re chasing that perfect highlight reel, documenting a jaw-dropping glitch, or just building a personal archive of memorable gameplay, knowing how to take, organize, and share Steam screenshots efficiently changes everything. This guide walks you through the essentials: how to find Steam screenshots, where are Steam screenshots stored on your machine, and how to make them work for you in 2026.
Key Takeaways
- Steam screenshots are captured by default with F12, but customizing your hotkey and adjusting compression settings (JPEG vs. PNG) lets you optimize for performance and quality based on your needs.
- Steam saves screenshots in deep system folders like C:Users[YourUsername]AppDataLocalSteamuserdata, but the fastest way to find and browse them is through Steam’s built-in library view for each game.
- The Steam overlay (Shift+Tab) provides powerful screenshot management including instant capture, preview options, built-in editing tools with text annotations and blur functions, and direct community sharing without external software.
- Tagging screenshots with a consistent system (e.g., ‘pvp-win’, ‘glitch’, ‘speedrun’) makes it easy to organize and search through large libraries, while sharing to Steam Community Hubs connects you with other players of the same game.
- For social media and Discord sharing, export screenshots as files (JPEG for smaller size, PNG for lossless quality) and pair Steam’s native tools with third-party software like ShareX for advanced editing and batch processing.
- When hotkeys don’t work or screenshots fail to save, verify the hotkey binding in Steam Settings, enable the in-game overlay, check storage space, and confirm your game isn’t blocking overlay access due to anti-cheat or engine limitations.
Getting Started: Taking Your First Steam Screenshot
Taking a Steam screenshot is straightforward, but the defaults don’t work for everyone. Here’s what you need to know to get rolling right away.
Default Screenshot Hotkey and Basic Controls
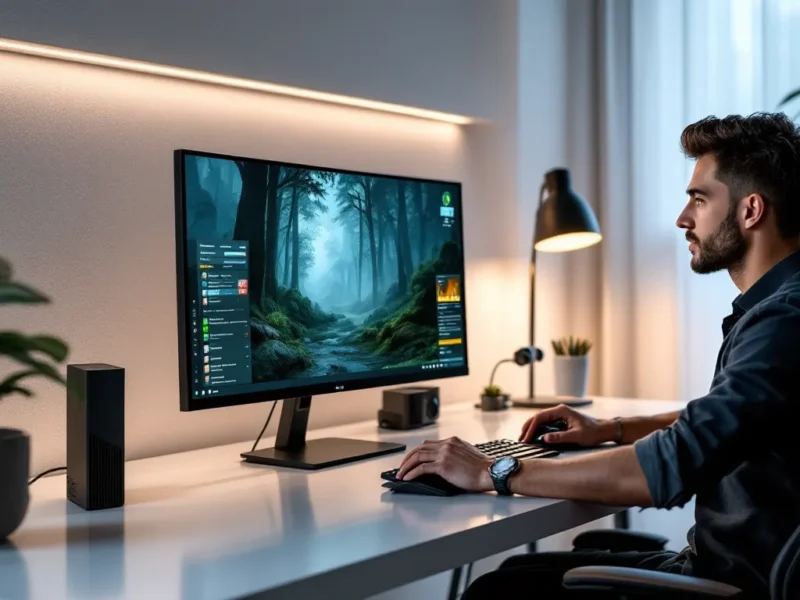
By default, F12 is your screenshot hotkey in Steam. Press it during any game, and Steam captures the current frame automatically. The screenshot saves locally to your system, and you’ll see a brief notification confirming the capture. That’s the basic flow, no overlay needed, no menu navigation.
On controller-heavy setups (Steam Deck or controller-first games), you can also bind screenshot to a controller button. The Steam overlay, accessible with the default Steam button on a controller, includes a built-in screenshot option as well. Different platforms handle this slightly differently:
- PC (Windows/Linux): F12 or custom hotkey: overlay access via Shift+Tab
- Steam Deck: Default gamepad button combo, or access via quick menu
- Mac: F12 (though Mac support for some games varies)
The key is that Steam hooks into the game directly when it can, meaning you capture what’s actually rendered on screen without affecting performance significantly.
Customizing Your Screenshot Hotkey
F12 works fine, but if you’re streaming, playing competitive titles where every key matters, or just want something more accessible, customization is straightforward. Open Steam Settings > Keyboard, then scroll to the Screenshots section. You’ll see the current hotkey binding. Click it and press your preferred key combination, anything from a single key to Ctrl+something works.
Common swaps include Print Screen, Scroll Lock, or a numpad key. If you’re using a controller, the process is similar but under the Controller Settings menu. Choose something that won’t conflict with in-game keybinds, especially if you’re playing competitive shooters or MMOs where every key is mapped.
Pro tip: If you play multiple games with wildly different control schemes, Steam allows per-game overrides. Right-click a game, select Controller Options, and set a game-specific hotkey. This prevents accidental screenshots during clutch moments in ranked matches.
Advanced Screenshot Features in Steam
Steam’s screenshot system goes beyond simple frame captures. The overlay and editing tools give you real control over what you’re capturing and how it looks.
Using the Steam Overlay Screenshot Tool
The Steam overlay (Shift+Tab by default) contains a dedicated screenshot panel that’s more powerful than the basic hotkey. Inside the overlay, you’ll find a camera icon or screenshot button. Click it, and you get options:
- Instant capture: Takes a screenshot immediately
- Screenshot preview: Shows you the last few captured images before saving
- Delete old screenshots: Purge captures directly from the overlay without navigating to file folders
The overlay method is useful when you want to verify what you’ve captured before it saves, or when you’re playing a game where the hotkey might conflict with gameplay. It’s also where you can browse and manage screenshots across multiple games in one place, critical if you’re building a library fast.
One advantage of the overlay approach: it’s platform-agnostic. Whether you’re on Windows, Linux, Steam Deck, or Mac (where supported), the overlay functions the same way. If F12 isn’t working in a particular game or engine, the overlay button always works.
Screenshot Editing and Annotation Options
Once you’ve captured a screenshot, Steam’s built-in editor lets you annotate directly. When viewing a recent screenshot in the overlay or in your library, click the edit icon. You get basic tools:
- Text annotations: Add captions or labels to highlight funny moments or important details
- Drawing tools: Mark up areas with arrows, circles, or freehand marks
- Crop and rotate: Adjust framing without needing external software
- Blur/redaction: Blur sensitive information like usernames, server IPs, or personal data before sharing
These edits are non-destructive, the original screenshot remains intact, and edits are saved separately. This is useful if you need multiple versions of the same capture (one for your archive, one edited for Discord, one for Twitter).
For more advanced editing, Steam’s built-in tools are adequate for quick adjustments, but serious creators pair them with external software like How-To Geek’s gaming setup guides often cover advanced capture workflows that include tools like Snagit, ShareX, or full image editors. The key is that Steam’s tools handle 90% of quick-share scenarios without friction.
Organizing and Managing Your Screenshot Library
Taking screenshots is half the battle. Organizing them so you can actually find that one insane moment from three months ago is the other half.
Finding Your Screenshots on Your Computer
Where does Steam save screenshots? The location depends on your setup, but on Windows, the default path is:
C:Users[YourUsername]AppDataLocalSteamuserdata[UserID]760remote[GameID]screenshots
On Linux/Proton, it’s typically:
~/.local/share/Steam/userdata/[UserID]/760/remote/[GameID]/screenshots
On Mac, Steam screenshots follow a similar structure within the Steam folder. The key variables are your Steam User ID (visible in your profile URL) and the App ID of the game you’re screenshotting.
Yes, this is deep in system folders. Most players don’t need to go here directly because Steam’s interface is the faster route, but if you’re archiving, backing up, or bulk-managing screenshots, knowing where Steam screenshots folder actually lives on disk is essential. You can always create shortcuts or use file indexing to make access faster.
Where to find steam screenshots in practice: use Steam’s built-in library view (under a game’s details page) before digging into file explorer.
Viewing Screenshots Within Steam
The easiest way to browse is within Steam itself. Navigate to any game, click on its store page, and scroll down to find the “Screenshots” tab at the bottom. This shows all captures for that game, thumbnailed and organized. Click any image to view it full-size, and you’ll see upload/delete/edit options.
From this view, you can also:
- Right-click for context menu: Copy image, open in file explorer, share directly to Steam community
- Use the carousel: Swipe or arrow through screenshots without closing the view
- Sort by date: Most recent first by default, but some filtering options exist
Alternatively, open the Steam desktop client, navigate to your Profile > Screenshots to see all captures across all games in one consolidated view. This is how you find steam screenshots fastest when you remember the game but not the exact image.
Creating Collections and Tags
Steam’s tagging system lets you label screenshots with custom tags. In the screenshot viewer, click the “Edit” button and add tags like “epic” “glitch” “tournament” “speedrun” or whatever taxonomy makes sense for your library. Once tagged, you can filter and search across all screenshots using these labels.
While Steam doesn’t yet have true “collections” in the traditional sense (curated folders), the tagging system serves the same purpose. Competitive players might tag ranked wins, speedrunners can tag PB runs, and casual players can mark funny moments. The search functionality across tags keeps everything accessible.
Pro workflow: Develop a consistent tagging system early (e.g., “pvp-win” “glitch” “aesthetics” “fail”), and tag screenshots the day you capture them. Future-you will appreciate it when you’re scrolling through 500+ images looking for that one perfect screenshot.
Sharing Steam Screenshots With Friends and Communities
Screenshots aren’t useful if they stay private. Steam makes sharing to the right audiences straightforward.
Sharing to Steam Community Hub
Every game’s Steam store page includes a Community Hub, a discussion board, artwork gallery, and screenshot feed all in one. Click the “Upload” button in the Community Hub’s screenshots section, select an image from your local Steam library, add a title and description, and hit post.
Community screenshots are visible to anyone browsing that game’s hub. They’re perfect for sharing tournament highlights, funny glitches, or impressive builds with other players of the same game. Your screenshot appears with your profile name, making it a light form of community contribution that can earn you rep or just laughs.
You can also share directly from the screenshot viewer: right-click a screenshot and select “Share on Community.” This bypasses the gallery upload screen and jumps straight to the post editor.
Community sharing is moderated, extreme content gets flagged and removed, but otherwise it’s wide-open. This is where casual screenshots shine: if you’re building a brand as a content creator, you might want more control.
Exporting for Social Media and Discord
For broader audiences on Twitter, TikTok, Discord, or YouTube, you need to export screenshots outside of Steam. The process is simple:
- Right-click the screenshot in Steam’s viewer
- Select “Open in File Explorer” or “Show on Disk”
- Find the file (typically saved as a JPEG or PNG)
- Copy it, then paste it into your chosen platform
Alternatively, many players use third-party tools like ShareX or Snagit to capture directly, which gives more control over format and export destinations. These are especially useful if you’re screenshotting constantly for streaming or content creation.
For Discord, you can drag-and-drop a screenshot directly into a message. Steam doesn’t have native Discord integration, so this file-based workflow is standard. If you’re part of gaming communities on Discord, sharing within servers keeps your best moments visible to your crew without needing to post publicly.
Steam also allows direct sharing to certain platforms via its overlay, but support is limited. Exporting the file manually and uploading ensures maximum compatibility. PC gaming optimization guides often cover streaming and capture workflows, which provides context on when to use Steam’s native tools versus external capture software.
Optimizing Your Screenshots for Quality and Performance
Not all screenshots are created equal. How you configure them affects file size, visual quality, and how they look when shared.
Screenshot Format and Resolution Settings
Steam captures at your current monitor resolution by default. If you’re gaming at 1440p, screenshots are 1440p. At 4K, screenshots are 4K. The format is typically JPEG (with slight quality loss for smaller files) or PNG (lossless, larger files).
You can configure this in Steam Settings > Screenshots:
- Save uncompressed screenshots: Forces PNG format instead of JPEG. Files are 3-5x larger but capture every pixel perfectly. Use this for archival or if you plan to edit heavily later.
- Save compressed screenshots: Default JPEG setting, much smaller file size (typically 1-3 MB per screenshot at 1080p), negligible visible quality loss.
For most gamers: Compressed (JPEG) is fine. You won’t see quality degradation unless you’re zooming in hard, and storage savings are significant. A competitive player taking 50+ screenshots per session benefits from the smaller footprint.
For artists, streamers, or archivists: Uncompressed PNG is worth the space trade-off if you’re editing, displaying full-screen, or storing for posterity.
Resolution doesn’t have a built-in scaling option in Steam, it captures native resolution. If you want smaller files without cutting resolution, compression (JPEG) is your tool. If you want multiple resolutions (e.g., one for archival, one for web), you’ll need to resize manually in an image editor after export.
Reducing File Size Without Losing Quality
Beyond the JPEG/PNG toggle, here are practical strategies:
- Use JPEG compression: Already mentioned, but it’s the single biggest lever. JPEG at 85-90% quality is imperceptible to most eyes while cutting file size dramatically.
- Batch resize via software: Export screenshots, then use tools like ImageMagick, Python scripts, or even Photoshop batch processing to resize 1440p screenshots to 1080p or scale them down for social media. This cuts file size by 30-50% depending on the scale factor.
- Remove metadata: Some tools add EXIF data that inflates file size. Tools like ExifTool can strip this if size is critical.
- Crop before saving: Framing your screenshot in the editor before export reduces dimensions naturally, shrinking file size as a side effect.
For streamers or content creators uploading daily, these optimizations add up. A weekly backup of 100 screenshots at 2 MB each (compressed PNG) versus 0.5 MB (JPEG) is 150 MB saved per week, 18 GB per year. Long-term, compression matters.
Pro tip: Set your compression preference in Steam Settings once, and all future screenshots use it automatically. No per-screenshot decisions needed.
Troubleshooting Common Steam Screenshot Issues
Sometimes screenshots don’t work as expected. Here’s how to fix the most common problems.
Screenshots Not Saving or Appearing
If you press F12 and nothing happens, or screenshots appear briefly then vanish, start here:
Check the hotkey: Verify F12 isn’t disabled or overridden. Open Steam Settings > Keyboard > Screenshots and confirm the binding is set. Some games (especially older titles or anti-cheat games) disable hotkeys as a security measure. Try taking a screenshot in Steam’s main menu before launching a game, if it works there, the issue is game-specific.
Verify in-game overlay is enabled: If the overlay is disabled in Settings, some games won’t allow screenshots at all. Go to Steam Settings > In-Game > Enable the Steam Overlay while in-game and toggle it on.
Check storage space: Screenshots fail silently if your drive is full or near capacity. Verify you have at least 2-5 GB free, especially if you’re capturing at high resolution.
Game compatibility: Very old games, some DRM-protected titles, or certain engines (mostly pre-DirectX 11) don’t play nicely with Steam’s overlay. Try launching the game in Steam’s Proton (on Linux/Deck) or Compatibility Mode (Windows).
Permissions issues: On Windows, if your AppData folder is restricted, Steam can’t write screenshots. Check that your C:Users[YourUsername]AppData is readable and writable by your user account.
If screenshots capture but don’t appear in Steam’s library, they might be saving to the wrong game’s folder. This happens when Steam misidentifies a game. Verify by navigating to the file paths mentioned earlier and manually checking if the PNG/JPEG files exist.
Hotkey Conflicts and Overlay Problems
F12 conflicts are common, especially in competitive games where every key is bound. If F12 triggers an in-game action (like abilities or UI toggles) instead of screenshotting:
- Rebind in Steam: Change the hotkey to something unused, like F11 or Scroll Lock.
- Check game settings: Some games hardcode F12. If the conflict persists, disable F12 in the game’s control settings explicitly.
- Overlay conflicts: If the overlay itself is acting weird (flickering, not responding), disable it, restart Steam, and re-enable it. Clearing the shader cache (in Settings > Shader Pre-Caching) sometimes fixes overlay glitches.
For Steam Deck users, if gamepad screenshot buttons aren’t working, verify that controller configuration is active. Dock the Deck and check Settings > Controller to confirm bindings are set correctly. If it’s a firmware issue, update SteamOS.
Another rare but annoying issue: overlay lag during screenshots. If the overlay appears to stutter when you press the hotkey, your system might be struggling. Lower your in-game graphics slightly, or check if another app is hogging resources. Closing browser tabs or background apps often fixes this.
Final nuclear option: Uninstall and reinstall Steam. This is rare, but corrupted Steam files can cause persistent screenshot issues. Before doing this, export your game list or save it elsewhere, uninstalling doesn’t delete game installations, but it’s safer to have a backup of your library list.
Pro Tips for Better Gaming Screenshots
Knowing how to take screenshots is one thing. Knowing what makes a great screenshot is another.
Capturing Cinematic Moments and Gameplay Highlights
The best screenshots freeze a moment that tells a story. Here’s how to capture them:
- Timing: The sweet spot is during peak action, right when a spell lands, the moment before a jump, or when enemies are positioned perfectly. Single screenshots from the middle of a hectic firefight often look chaotic. Pause-screen screenshots from your inventory or the main menu are safer for composition but less exciting.
- Lighting and weather: In games with dynamic weather (like RDR2, Cyberpunk, or newer AAA titles), certain times of day look dramatically better. Golden hour sunsets, moonlit landscapes, or dramatic storms create screenshots that pop without editing. Wait for good weather or console commands to adjust time-of-day if the game supports it.
- UI toggle: Most games have a UI-hiding hotkey (usually Tab, ~ , or something similar). Hide UI before screenshotting for cleaner frames. Steam doesn’t capture UI overlays in most cases, but some menu UI still appears. Get rid of it.
- Depth and composition: Include foreground, subject, and background for visual depth. Don’t just snap the center of the screen. Move the camera to frame interesting elements, a landscape with character in the middle, an explosion with destroyed environment around it.
- Multiplayer magic: Competitive wins, funny ragdoll moments, or team coordination photos are golden. In MMOs, raid group photos are timeless. Capture these in-the-moment because they’re unreproducible.
For esports or tournament-level play, screenshots of victory screens, final eliminations, or scoreboard moments are automatically great because they’re loaded with context.
Editing Tools and Third-Party Software Recommendations
Steam’s built-in editor handles basic annotation, but power users pair it with external tools. PC gaming coverage from for serious players.
Free tools:
- ShareX: Lightweight, open-source, integrates with Steam’s screenshots, supports cloud uploads, hotkey customization. Perfect for streamers and content creators.
- Snagit (free trial): More polished UI, powerful annotation, pixel-perfect cropping. Worth the trial even if you don’t buy.
- GIMP: Overkill for screenshots, but if you need serious editing (color correction, layer manipulation), it’s free.
Paid tools:
- Snagit (full license): One-time or subscription, professional-grade screenshots with templates and presets.
- Adobe Photoshop: Overkill unless you’re already a Photoshop user, but unmatched for advanced editing.
In-game tools:
Many modern games include photo modes (Cyberpunk, Elden Ring, Ghost of Tsushima, most recent AAA titles). These are often better than Steam screenshots because they let you pause, adjust angles, apply filters, and frame perfectly. Screenshot from within the photo mode, and you get a superior image without needing external tools.
Workflow tip: Take the screenshot in Steam, edit in ShareX or Snagit if needed (crop, annotate, blur), then export to Discord or social media. This three-step process is faster than jumping between applications and keeps your workflow clean.
For competitive players: don’t overthink it. A clean, unedited screenshot of your rank, trophy, or victory screen speaks for itself. Annotation adds context only if needed (e.g., marking a key position or enemy location for strategy breakdowns).
Conclusion
Steam screenshots are deceptively powerful. What starts as a simple F12 hotkey evolves into a full archival, organization, and sharing system that rivals dedicated capture software. Whether you’re documenting esports victories, building a personal photo library of memorable moments, or sharing clips across Discord and social media, mastering these tools saves time and ensures your best moments are captured, organized, and shareable.
Start with the basics: set your hotkey, understand where does Steam save screenshots on your system, and use Steam’s library view for browsing. As you accumulate more captures, leverage tags and the overlay editor to stay organized. Finally, explore sharing options that fit your audience, community hubs for other players, file exports for social media, or direct Discord sharing for your crew.
The meta continues to shift, and Steam regularly adds small features and optimizations to its screenshot system. But the fundamentals, knowing how to take, find, organize, and share steam screenshots, remain foundational. Master these, and you’ll capture and preserve the moments that matter.