Table of Contents
- Where do my screenshots go MacBook Air?
- How do you screenshot on a MacBook Air 2022?
- How do I select a screenshot on a Mac?
- Does MacBook Air have right click?
- How do I use the m1 trackpad?
- How do you right click on a MacBook Pro m1?
- How do you screenshot on a Macbook Air 2021?
- Why is my laptop not Screenshotting?
- How do I screen shot?
- How do I print from macbook air?
- Why cant I find my screenshots Mac?
- How do you save a screenshot as a picture on a Mac?
- How do you take a screenshot on a Mac without a keyboard?
- Where is Shift key on Mac?
- How do you take screenshots on laptops?
- How do you left click on a Macbook Air?
- How do you double click on a Mac?
- How do you copy with a Mac?
- How do I use my MacBook Air m1?
- Does MacBook Air have touch pad?
- Does MacBook Air have touch bar?
- Where is right click on Macbook Pro?
- Why wont my Apple Magic mouse right click?
- What is right click?
- How do you screenshot on the Macbook Pro m1?
- Why is my screenshot shortcut not working Mac?
- How do I take a screenshot without Print Screen?
- Why cant I take screenshots anymore?
- Where are Screenshots saved?
- How do you take a screenshot on IOS 13?
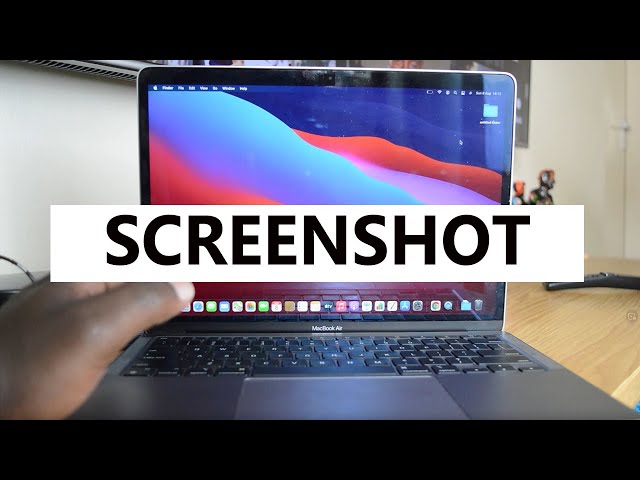
Learn how to take a screenshot on your new Macbook Air M1 by following these simple steps. With this handy guide, you’ll be able to capture images and share them with friends and family in no time!
Where do my screenshots go MacBook Air?
Unless you modify the settings, when you take a screenshot on your MacBook Air M1, the picture will be saved to the desktop. Simply open a Finder window and search for the “Screenshots” folder in your list of documents to retrieve your screenshots. If it isn’t there, launch the Screenshot app on your smartphone and look for it there instead.
The folder will include all of your screenshots from recent times, and they’ll generally have a name like “Screen Shot 2021-03-04 at 11.45.45 AM”. To arrange these photographs, right-click on them and choose “Get Info” to rename them with a more appropriate title. This will make it easier to discover them later if necessary.
How do you screenshot on a MacBook Air 2022?
It is simple and quick to take a screenshot on a MacBook Air M1 2022. To begin, use the Command+Shift+4 shortcut combination. This launches the screenshot selection tool. Select the area of your screen that you wish to record using your mouse or trackpad. When you’ve picked all of the stuff you want, just let go of the mouse/trackpad and the screenshot will be captured automatically.
You may also access the screenshot tool by pressing Command+Shift+5. This enables you to take an entire-screen shot, an app window shot, or access additional settings such as:
- Establishing a timing delay before taking a picture
- Altering the default location for screenshots
Once you’ve decided, choose Capture or Take Screenshot to capture what’s presently on your screen.
How do I select a screenshot on a Mac?
It is easy to take a screenshot on your Macbook Air M1. Simply open the screen or program you wish to record and use the Command+ Shift+ 4 shortcut. This will transform your mouse pointer into a crosshair that you may use to choose a portion of the screen. When the relevant region is selected, just click to save a screenshot of that portion of the screen to your Mac.
The picture will be saved in your Pictures folder, but you may save it somewhere by pressing Spacebar and then selecting where you wish to save it when requested. If all else fails, just drag the collected stuff from its default position and put it in a different folder of your choosing.
Does MacBook Air have right click?
Right clicking on a Macbook Air M1 using a mouse or trackpad is possible. If you have an external mouse, you can conduct a right click by pressing the right-click button. If not, you may activate secondary click on both the Magic Mouse and the trackpad.
- Open System Preferences and then pick the Mouse option from the menu to activate secondary click for the Magic Mouse.
- Locate the Secondary Click tab from the left side menu in the mouse settings window and then pick either Click in bottom Right“” or Click in bottom Left“, whichever works best for you.
- Enabling Secondary Trackpad Click Select Secondary Click in the Force Touch Trackpad section of System Preferences > Accessibility > Pointer Control. This manner, the MacBook Air will also be able to conduct a right-click operation.
How do I use the m1 trackpad?
One of the new features of the Macbook Air M1 is the M1 trackpad. It is a very sophisticated and adaptable technology that enables users to explore, select, and modify items on their computers. The trackpad enables multi-touch motions such as clicking with one finger, scrolling with two fingers, and panning with three fingers. When navigating through your Mac’s menus or utilizing programs, you can also utilize force touch to obtain haptic feedback. Pressure-sensitive drawing is also supported by Force Touch in programs like as Photoshop and Sketch.
You may also use the M1 trackpad in conjunction with your Magic Keyboard or Magic Mouse to take screenshots of your screen or a section of your screen by hitting particular modifier key combinations.
How do you right click on a MacBook Pro m1?
The process of right-clicking on a MacBook Pro M1 is similar to that of any other Apple laptop, however there are several peculiarities. If you’re using a trackpad, you can press and hold two fingers down until the context menu displays. If you’re using a mouse, you may accomplish the same thing by just clicking the right mouse button.
Furthermore, Apple has made it easy to right-click on the new Macbook Pro M1. By swiftly pressing and holding the Control (Ctrl) key twice in a row, a tiny menu will display, allowing you to choose your chosen action from a choice of possibilities. This shortcut is quite handy and saves time over using two fingers or a mouse every time you need to right-click anything.
How do you screenshot on a Macbook Air 2021?
Taking a screenshot on your Macbook Air M1 2021 is simple, and you may do it with two key combinations depending on how much of the screen you want to record.
- The first combination grabs the full screen and is accomplished by simultaneously pressing Command and Shift + 3.
- The second combination grabs a particular element or window by pressing Command + Shift + 4 at the same time. When you press them, your cursor will transform into a crosshair that will target your selected location for capture.
If this doesn’t work, make sure your Macbook Air M1 2021 is running the most recent version of macOS.
Why is my laptop not Screenshotting?
There are a number possible causes for why you’re having problems capturing screenshots on your Macbook Air M1. The most typical reason is that you are taking screenshots with the incorrect key combination. If you have an M1 chip in your Mac, the right combination is ‘Shift+ Command+ 5.’ This will launch the Screenshot Tool, allowing you to take both screen and window images.
Additionally, ensure that your screenshot settings are proper. Click ‘Keyboard’ in your System Preferences menu, and then ensure that your ‘Screenshot’ options are selected; this should include any shortcut instructions for capturing screenshots.
Finally, rebooting your computer may occasionally assist resolve program conflicts that prevent screenshots from functioning correctly.
How do I screen shot?
Screen shots are an excellent method for rapidly capturing and saving what is on your screen. Taking screenshots on the Macbook Air M1 is straightforward, requiring just a few keystrokes.
- To take a screenshot of the full screen, press and hold Command+ Shift+ 3, then release the keys. The screen shot will then display and be saved to your desktop as a .png picture file.
- To capture just a portion of the screen, hold down Command+ Shift+ 4, then drag the crosshairs over the area you wish to capture. When you let go of the mouse or trackpad, the picture is saved to your desktop as a .png file.
- You may also pick certain windows by holding down Command+Shift+4+Spacebar while your mouse is hovering over an app window. This allows you to simply choose exactly what you want in your screenshot and avoid having to crop it afterwards.
How do I print from macbook air?
Printing from a Macbook Air M1 is simple and may be accomplished using the Apple Menubar. To begin, open the Print app from the Menubar and then pick your printer choices. When you decide where you want to print, be sure to select “Print to,” and then select the printer in your home or business you want to print from.
You can also take screenshots on the Macbook Air M1 by pressing the Command+Shift+4 shortcut, which displays a crosshair cursor that allows you to select any area of your screen to capture and save as an image file. After taking a screenshot, it is saved to your desktop for easy access for printing or sharing with others.
Why cant I find my screenshots Mac?
If you took a screenshot on your Macbook Air M1 but can’t seem to find it, there are a few things you may try.
- The first step is to launch the Finder program, which gives you access to all of the folders and files on your laptop. When in the Finder window, check for a picture with a file name that starts with ‘Screen Shot’ in the sidebar. This denotes that this is your screenshot.
- If it isn’t there, try taking another screenshot by hitting Command+Shift+3 or Command+Shift+4;, which will store the screenshots in a new place.
- If none of these work, return to Finder and choose ‘Pictures’ from the sidebar; all screenshots taken with your Macbook Air M1 will be saved here.
How do you save a screenshot as a picture on a Mac?
It is simple to take a screenshot on a Mac. By hitting the Command+ Shift+3 keys on your keyboard, you can save a screenshot as a photograph. This will take a full-screen capture of your current window and save it as an image file in the format you choose in the ‘Screenshot Preferences’ options. The file will be saved to your desktop by default, but you may modify this if you want to save it somewhere else.
If you wish to save just a portion of the screen, press Command+ Shift+4, which brings up an image selection tool. When done, drag over the area you want to capture and click ‘Capture’. This has the same effect as Command+ Shift+3, but just on the screen area you’ve picked.
How do you take a screenshot on a Mac without a keyboard?
There are numerous methods for taking a screenshot on a MacBook Air M1 or other Mac computer without a physical keyboard. Using the macOS screenshot keyboard shortcuts is one of the most used approaches. You may take a full-screen screenshot of your Mac display by pressing Command+ Shift+ 3. You may also manually pick particular portions of your screen by pressing Command+ Shift+ 4 and dragging.
If you don’t feel comfortable utilizing keyboard shortcuts, there are various methods for taking screenshots that don’t need you to physically touch any keys. You may use the Grab utility software from your Applications folder to take timed screenshots and crop them afterwards, or you can utilize Preview’s Take Screenshot function to photograph particular elements on your screen, such as windows and menus. Finally, third-party applications are available that make it even simpler to snap screenshots without a real keyboard.
Where is Shift key on Mac?
On a Mac, the Shift key is located on the left side of the keyboard. It has the appearance of an up arrow and is situated between the Command and Caps Lock keys. The Shift key is used to trigger several functionalities, such as capitalizing letters in text or inputting alternative characters that are written on certain keys. For example, while hitting the number 6 key with shift held down it will type “^” instead of “6”.
In addition, the Shift key, as well as other keys, may be used to take screenshots on the Macbook Air M1. To take a screenshot on your Macbook Air M1, press Command+Shift+4 to choose a region of your screen or Command+Shift+ 3 to capture your full screen.
How do you take screenshots on laptops?
Taking a screenshot on your Macbook Air M1 is simple and only takes a few seconds. Press and hold “Command”+”Shift”+”3” to take a screenshot. This key combination will save your full display to the desktop. A shutter sound will signify that the screenshot was captured.
Alternatively, you may enter selection mode by pressing Command+Shift+4. Then, using your mouse, choose the area of your display that you want to capture. When the screenshot is captured, you will hear another shutter sound.
Both of these techniques will store your screenshots as PNG files on your desktop, where you can quickly access them later and share them with others if necessary.
How do you left click on a Macbook Air?
On a Macbook Air M1 device, left clicking is accomplished by merely pressing the touchpad with one finger. If your system is configured to utilize the default button arrangement, pressing down with one finger will register as a left click rather than a right click. You may also use one finger to press and hold on the trackpad to simulate a left mouse click.
On a Macbook Air M1, double‑click by pressing down twice fast with one finger instead of holding the initial push. If you deactivate tap‑to‑click capabilities in System Preferences, you must left click with two fingers rather than one. This is accomplished by pushing both fingers down at the same moment and then releasing them simultaneously to register as a left click.
How do you double click on a Mac?
On a Mac, a double click is executed by pressing and releasing the left mouse button twice fast, generally within a quarter of a second. Double-clicking is used to run programs or access certain directories. It can also pick text, create shortcuts, and do other functions.
Simply press and release the left mouse button twice rapidly on your Macbook Air M1 laptop to conduct a double click. It should be noted that for this to operate, the pace and precision of the clicks must be constant. If everything is done properly, the action you intend to take will be completed automatically without your intervention.
How do you copy with a Mac?
Taking screenshots is an important function of a Macbook Air M1. Users may record on-screen action and store it as a picture or video file by taking screenshots. This is handy for preserving and sharing information from websites, papers, games, and other visual material. Using keyboard shortcuts, you may easily capture screenshots on your MacBook Air M1.
The most frequent way to take a screenshot is to press the Command+Shift+3 key at the same time. This saves the full screen as an image file, which you may then retrieve later by saving it with any filename of your choosing. Furthermore, if you want to record just a piece of the screen rather than the full thing, use Command+Shift+4 instead, then move your mouse cursor over the region you wish to capture. After you’ve made your selection, press Command+Shift+4 again, and that region will be saved as an image file on your Macbook Air M1.
How do I use my MacBook Air m1?
Using an M1-powered Macbook Air is simple and straightforward. You can perform practically everything on other Macs, but there are several processes that are unique to the M1 processor. Taking a screenshot is one of the most significant things you can do with your MacBook Air M1.
Taking a screenshot on your Macbook Air M1 is a straightforward two-step process:
- Press Command+ Shift+ 4 to begin.
- Choose the area you wish to include in your screenshot.
When you select this option, an image of the area will be saved to your desktop with the label “Screen Shot” followed by the date and time. You can use this file for a variety of purposes, including providing proof for customer service issues or quickly sharing something with a friend or colleague via messaging services and social media platforms.
Does MacBook Air have touch pad?
Yes, the MacBook Air does have a touchpad. The newest MacBook Air model is the M1, which has a 13.3-inch Retina display and a Force Touch touchpad with haptic feedback and pressure sensitivity. It is bigger than previous versions and allows for greater movement in your motions.
Force Touch may be used to preview files, seek up meanings for terms fast, and activate Quick Actions from the Finder. You can also change what occurs when you use various pressure levels on the trackpad, such as opening a file in Quick Look when you push gently or in its default application when you press harder.
Does MacBook Air have touch bar?
The answer to “Does MacBook Air have a touch bar?” is no. There is no touch bar on the MacBook Air M1 variants. The touch bar was originally available on the 2016-2019 MacBook Pro models, which are no longer for sale. These versions had the same slender shape and simple style of the MacBook Air M1, but added a multi-touch enabled control strip to the top of the keyboard. This touch bar was created to enable users to rapidly access certain features with a single tap or swipe.
Current MacBook Air models have an illuminated logo on the lid and an exquisite metal etch of Apple’s butterfly switch keyboard underneath it.
Where is right click on Macbook Pro?
The right click function on a Macbook Pro laptop is the same as it is on other Mac laptop models. To utilize the right click capability, hold the Control⌃ key down while clicking with your trackpad or mouse. You may also use the three finger gesture to launch the shortcut window by swiping up with three fingers at the same time. You may also do a right click on a Magic Mouse by pushing down with two fingers.
Right-clicking works exactly as it does on any other Mac laptop on recent Macbook Pro models with the M1 processor. However, if you have an older model, you may need to go into System Preferences and under Mouse choose “Secondary Click” in order for right-clicking to operate.
Why wont my Apple Magic mouse right click?
The Apple Magic Mouse is a multi-touch gadget with no right-click button. If you have problems right-clicking on your Magic Mouse, such as being unable to do so or the mouse not reacting correctly, there might be a problem with your mouse settings or software.
The first step is to launch System Preferences and go to the Hardware section. Check that your mouse tracking speed and double-click speed are both set to Fast once this window is open. In System Preferences, go to Accessibility and make sure that Mouse Keys is turned off. If these settings are accurate and you are still experiencing problems, consider resetting your device’s PRAM or Parameter RAM by hitting Option+ Command+ R+ P upon startup. This will erase any previously saved settings for pointing devices like mice or trackpads.
What is right click?
Right-clicking is a mouse operation that opens a menu of choices linked to the file or program that the user is pointing at. You may access a list of choices related to the item being pointed at by pressing the right-mouse button.
Right-clicking on a photograph in your pictures app, for example, will offer you rapid access to photo editing options. Right-clicking may also be used instead of using menus to do regularly used tasks such as rename, copy & paste, or save as.
Knowing how to locate and utilize this function is critical for each Macbook Air M1 owner. It not only saves time, but it may also let you take screenshots without having to go into settings or locate an on-screen button every time.
How do you screenshot on the Macbook Pro m1?
Screenshots are an excellent method to record what’s on your Macbook Pro m1 screen. Taking screenshots on the new Macbook Pro m1 is simple, whether you want to share a hilarious joke or maintain copies of crucial papers.
To take screenshots on the Macbook Pro m1, use one of the following three shortcuts: Command+ Shift+ 3, Command+ Shift+ 4, or Command+ Control+ Shift+ 3. Your screenshot will be saved to your desktop or copied to your clipboard depending on the combination you pick.
Use the Command and Shift keyboard keys in combination with dragging your mouse over the region you wish to capture to capture anything from just a portion of your screen. Grab in the Applications folder gives you greater flexibility over where and how much of the screen you take a screenshot of. It enables significantly better accuracy while shooting photographs on the Macbook Pro m1.
Why is my screenshot shortcut not working Mac?
If you have one of the latest M1-powered Macbooks, you may have noticed that the screenshot shortcut does not function. This might be due to a software issue or a configuration mismatch.
To debug, make sure that the appropriate settings for screenshot capturing through keyboard shortcuts are enabled. You may accomplish this by heading to System Preferences and selecting Keyboard and Accessibility. Make sure ‘Screenshots’ is checked under ‘Shortcuts’, and then try capturing a screenshot with your keyboard shortcut again.
If it doesn’t work, try restarting your device or resetting the SMC System Management Controller on your Mac. If everything else fails, you may manually take screenshots using the Grab program, which can be located under the Applications > Utilities folder.
How do I take a screenshot without Print Screen?
If you want to take a screenshot without utilizing the Print Screen feature, there are numerous options. The Command+Shift+3 shortcut on the Macbook Air M1 is undoubtedly the simplest and most easy method to take screenshots with ease. This key combination will immediately capture the full screen and save it to your clipboard, so all you have to do is paste it wherever you need it.
Alternatively, Command+Shift+4 will enable you to manually choose a region of your screen to screenshot; just click, drag, and release when finished. Finally, Command+Shift+5 may be used to record a tiny portion of your screen.
Taking screenshots on the Macbook Air M1 should be a snap with these steps:
- Press Command+Shift+3 to capture the full screen.
- Press Command+Shift+4 to capture a region of your screen.
- Press Command+Shift+5 to record a portion of your screen.
Why cant I take screenshots anymore?
Taking screenshots on a Macbook Air equipped with an M1 CPU might be difficult. This is due to a change in Apple’s screenshot capture technique for their newest devices. To take a screenshot on a Macbook Air with an M1 CPU, you must use two different key combinations depending on the sort of screenshot you wish to record.
- Press and hold the Shift-Command-⌘ keys to take standard still screenshots. At the bottom of your screen, you will see an onscreen menu where you can choose whether you want the picture to be taken in a window or as the complete screen display. You may also pick between normal and high definition resolutions, as well as whether or not to add audio. After you’ve picked your settings, click the Capture button in the bottom right corner of the menu to take your screenshot.
- Instead of ⌘, use Shift-Command-⇧ to take video screenshots. The same menu elements should display as when shooting still screenshots; but, before taking the shot, all video parameters such as recording duration, frames per second (fps), audio capture option, and so on must be preset. To begin recording when all settings have been chosen, just tap Record in the bottom right side of the menu and begin capturing everything that occurs until it is manually stopped by selecting Stop at the same location where Record was triggered.
Where are Screenshots saved?
Screenshots taken on the Macbook Air M1 are saved to the desktop by default. A screenshot’s file name is commonly “Screen Shot” followed by the date and time it was captured. A screenshot captured at 3:09PM on June 15th, for example, might be called Screen Shot 2020-06-15 at 15.09.45.png.
You may also change the location of screenshots by modifying the settings in the “More Options” section while capturing the screenshot.
If you’re running OS X El Capitan or later, you may also take screenshots of just a section of your screen. When you pick this option, you may specify which portion of your screen should be taken, and your selection will be highlighted in yellow as you move your mouse pointer over it. Once chosen, the specified section of your screen will be recorded and saved to your Macbook Air M1 desktop in the same manner as a full-screen screenshot would be saved, with the file name including “Screen Shot” followed by the date and time it was taken.
How do you take a screenshot on IOS 13?
Taking a screenshot with the latest IOS 13 is simple. Simply press and hold the side and volume up buttons simultaneously, then release when you hear the shutter sound. This will immediately save a.png file of your screen to your camera roll.
You can also take a screenshot using an Apple Pencil if you have one. Simply press the side button and hold the tip of your Pencil near the display of your smartphone until it vibrates.
In addition, if you have an M1 Macbook Air, you may utilize the trackpad to take rapid screenshots. To do so, press and hold Command+ Shift+ 4 to bring up the selection mode cursor; from here, drag over the region of your screen you wish to screenshot, and then click Enter when finished. The.png file will be saved on your computer’s desktop, ready for sharing or editing.