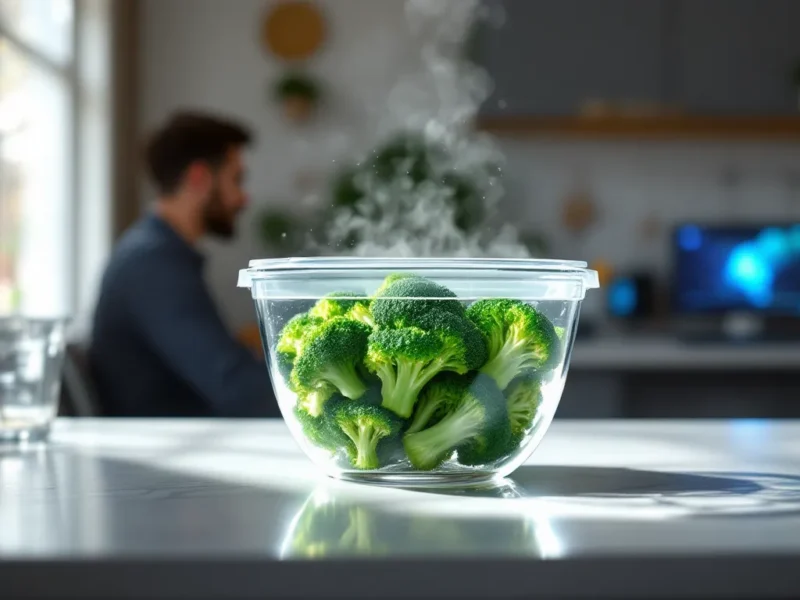
Cooking lobster at home doesn’t require a culinary degree, just precision and patience. Whether you’re prepping for a celebration dinner or simply craving a restaurant-quality meal, steaming is the gold standard for achieving tender, succulent meat without the rubbery texture that boiling can introduce. The key? Knowing exactly how long to steam lobster based on size, and understanding the small tweaks that separate mediocre results from restaurant-quality perfection. This guide breaks down everything you need to know to consistently nail it.
Key Takeaways
- Steam lobster based on weight: small lobsters (1–1.5 lbs) require 12–15 minutes, medium (1.5–2.5 lbs) need 15–20 minutes, and large specimens (2.5+ lbs) demand 20–35+ minutes for perfectly tender meat.
- Steaming preserves flavor and texture better than boiling because indirect heat cooks lobster evenly without leaching delicate sweetness or creating a rubbery texture.
- Verify doneness by checking that tail meat is completely opaque, separates cleanly from the shell, and reaches an internal temperature of 145°F (63°C) using a meat thermometer for guaranteed results.
- Proper setup—including a pot with 1–2 inches of water, a tight-fitting lid, and a steamer insert that elevates lobsters above the waterline—ensures consistent steam generation and even cooking.
- Avoid common mistakes like overcooking (the most frequent error), stacking lobsters of different sizes, adding cold water during cooking, or using insufficient water that kills steam production.
Understanding Lobster Steaming Basics
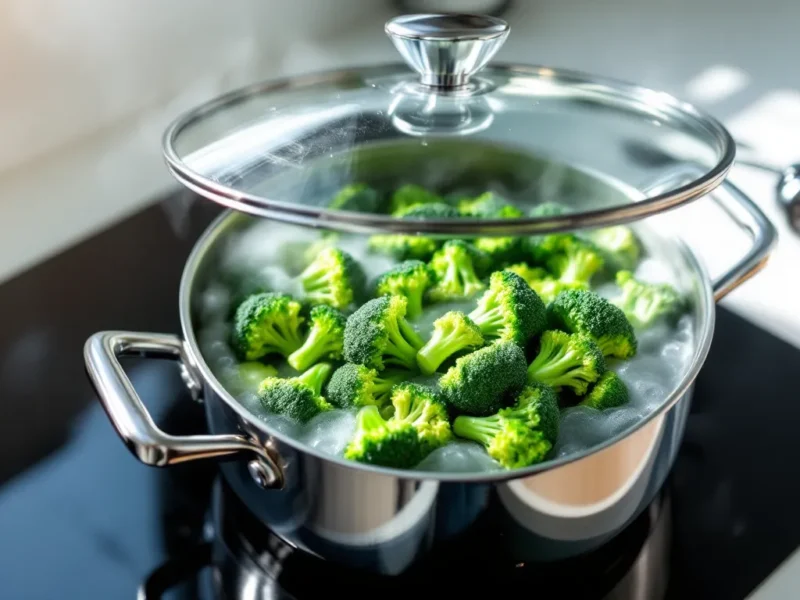
Steaming lobster is fundamentally about using steam, hot water vapor, to cook the meat evenly and gently. Unlike boiling, where the lobster is submerged in water, steaming uses indirect heat that cooks from the outside in, preserving moisture and flavor in the process.
The science is straightforward: steam transfers heat efficiently at around 212°F (100°C), the boiling point of water at sea level. This consistent temperature ensures even cooking throughout the entire lobster without the harsh, direct contact that can toughen the meat. The shell acts as a natural insulator, allowing the inside to cook through while the exterior stays intact.
When you’re steaming lobster, timing is everything. A few minutes too long and you’ve got rubbery, overcooked meat. A few minutes too short and you’re dealing with translucent tissue that hasn’t set properly. This is why weight-based timing guidelines exist, they account for the different densities and sizes across lobster specimens.
Why Steaming Is the Preferred Cooking Method
Steaming has become the go-to method for serious cooks and restaurants alike. It’s not just tradition, there are tangible advantages that make it worth the extra setup compared to simply dumping lobster in a pot.
First, flavor retention. When lobster is submerged in boiling water, some of the delicate sweetness leaches into the water. Steaming keeps that flavor locked in the meat. Second, texture. The gentle, indirect heat of steam cooks more evenly, resulting in meat that’s tender rather than dense. Third, consistency. Boiling temperatures can fluctuate, especially if you’re cooking multiple lobsters. A steamer with proper water management maintains a stable environment.
For larger lobsters especially, steaming prevents the outer meat from overcooking while the center finishes. This is critical when you’re dealing with 3+ pound specimens where boiling would require such long times that the exterior would be dry before the tail is done.
Steaming Versus Boiling: Key Differences
Let’s get specific about why steaming outperforms boiling:
Flavor Loss: Boiling releases proteins and minerals into the water, diluting flavor. Steaming keeps these compounds in the meat where they belong.
Texture Outcome: Steam heats more gradually and evenly. Boiling creates temperature spikes that can shock the protein structure, causing the meat to contract and become tough. Steamed lobster has a butter-like consistency that boiled lobster rarely achieves.
Cook Time Control: Boiling requires managing water temperature across the entire pot volume. Steaming needs only enough water to generate consistent steam, making it more predictable.
Meat Adherence: Boiled lobster meat tends to stick to the shell more aggressively. Steamed meat separates more cleanly, making it easier to extract and enjoy.
Neither method is “wrong”, boiling is faster and simpler, but if you’re putting in the effort to cook lobster, steaming delivers noticeably better results.
Steaming Time Guidelines by Lobster Weight
Weight is your primary timing reference. A lobster’s mass determines how long heat needs to penetrate to the center. These guidelines assume sea-level steaming with proper water management, adjustments may be needed at high altitudes or with unconventional setups.
Small Lobsters (1 to 1.5 Pounds)
Small lobsters are the fastest to cook and often the most tender. They’re ideal for beginners because they’re forgiving.
Steaming time: 12-15 minutes.
At 1 pound, the meat is relatively accessible to heat penetration. The shell heats quickly, and the internal temperature reaches the safe zone (around 145°F/63°C) in the lower end of this range. Go with 12-13 minutes if you prefer slightly firmer meat that still has juice: push toward 15 minutes if you want maximum tenderness and don’t mind slightly softer texture.
Small lobsters are common in markets and restaurants for a reason: they cook fast, they’re easier to handle, and there’s less surface area where overcooking can occur.
Medium Lobsters (1.5 to 2.5 Pounds)
Medium lobsters represent the sweet spot for most home cooks. They’re large enough to yield substantial meat portions but still cook relatively quickly and evenly.
Steaming time: 15-20 minutes.
The 1.75-pound range is probably the most common size you’ll encounter. Start checking at 15 minutes if you’re on the smaller end of this range, but most lobsters in this category are ready between 18-20 minutes. The increased mass means heat takes longer to reach the tail and claw tips.
At this size, the tail meat should be opaque throughout and pull away cleanly from the shell. If you see any translucency in the thickest part of the tail when you cut, add 2-3 minutes and recheck.
Large Lobsters (2.5 to 4 Pounds)
Large lobsters demand patience. The increased mass means more time for heat to penetrate evenly, and this is where steaming really shines over boiling, the outer meat doesn’t overcook while you’re waiting for the center to finish.
Steaming time: 20-25 minutes.
A 3-pound lobster can take 22-24 minutes. A 4-pound specimen often needs the full 25 minutes or even 2-3 minutes more. The density is significantly higher, and the tail, the thickest part, requires the most time.
Large lobsters are often saved for special occasions, and they reward the extra cooking time with impressive meat volume. The key is patience: rushing this category almost always results in an underdone center.
Extra-Large Lobsters (4+ Pounds)
Extra-large lobsters are statements. They’re expensive, impressive, and require respect during cooking. These are typically 5-8 pounds for home cooking, occasionally larger.
Steaming time: 25-35+ minutes.
A 4.5-pound lobster often needs 25-28 minutes. A 6-pound lobster can require 30-35 minutes. Beyond 6 pounds, add roughly 4-5 minutes per additional pound.
With these sizes, undercooking becomes a real risk because of how long the process takes. Use a meat thermometer if available, the center of the tail should reach 145°F (63°C). The meat will be firmer and less sweet than smaller specimens simply due to its age and development, but it should still be tender if cooked correctly.
Extra-large lobsters are where technique truly matters. Even a few minutes of variation can affect the final result significantly.
Essential Equipment and Preparation
Before you start steaming, your setup matters as much as your timing. A poorly configured steamer or unprepared lobster can derail even perfect timing.
Choosing the Right Pot and Steamer Setup
You don’t need specialized lobster-cooking equipment, but you do need proper steam generation and containment.
The pot itself: A stockpot or large canning pot works perfectly. It needs to be big enough that your lobsters don’t overlap and to hold at least 1-2 inches of water. Too small and you won’t generate enough steam: too large and you’ll waste heat and water.
Steamer insert options:
- Collapsible steamer basket: The most common choice. It sits inside the pot and keeps lobsters elevated above the water line. Look for one with sturdy legs that won’t collapse under weight.
- Bamboo or metal steamer tier: Professional steamers often use tiered baskets. This lets you cook multiple lobsters efficiently.
- DIY approach: You can use a tall trivet, upside-down metal bowl, or even crumpled aluminum foil to create a platform. Just ensure it keeps the lobsters at least 2 inches above the water.
Water level: Fill your pot with about 1-2 inches of water. The goal is enough to generate consistent steam for the entire cooking duration without the water touching the lobsters. Check the water level halfway through cooking if you’re doing multiple large specimens, you might need to top it off.
Lid: You absolutely need a tight-fitting lid. Steam escapes quickly with a loose fit, and you’ll lose cooking consistency. If your pot’s lid is loose, use plastic wrap or aluminum foil to seal gaps.
Preparing Your Lobsters Before Steaming
Prepared lobsters cook better and more safely. A few quick steps make a significant difference.
Chilling: Keep your lobsters in the coldest part of your refrigerator until cooking time. Cold lobsters are less active and easier to handle. They also cook more evenly because the initial temperature is consistent.
Rinsing: Rinse each lobster under cold running water. This removes surface debris, dirt, and any mucus buildup. Pat them dry with paper towels, wet lobsters steam just fine, but dry ones transfer heat slightly more efficiently.
Humaneness consideration: Many cooks split the lobster’s head with a sharp knife before steaming to ensure a quick death rather than gradual heating. This is optional but recommended if you’re comfortable with the technique. Place your knife on the center of the head and apply firm, quick pressure to split it cleanly in half before placing it on the steamer.
Positioning: Arrange lobsters so they don’t touch each other. If any are stacked, they won’t cook evenly, the top one will finish before the bottom one. If you’re steaming multiple lobsters, they should all be roughly the same size for even cooking, or add extra time to account for the largest specimen.
Rubber band removal: Those bands around the claws? Leave them on. They prevent the lobsters from damaging themselves or each other during cooking. They’ll soften in the steam and come off easily afterward.
Step-by-Step Steaming Process
Now that you’re prepared, let’s walk through the actual process. This is where precision matters most.
Setting Up Your Steaming Station
-
Fill your pot with 1-2 inches of water. Use filtered water if you have it, it prevents mineral deposits on your equipment. Tap water works fine, but filtered leaves less residue.
-
Bring the water to a rolling boil. You want vigorous steam production before you add the lobsters. This establishes the baseline temperature and ensures consistent cooking from the moment they hit the steamer.
-
Place your steamer insert in the pot while the water is coming to temperature. This preheats it and prevents temperature drops when you add the lobsters.
-
Arrange the lobsters on the steamer. Place them shell-side down (back on the steamer, belly up). This orientation keeps the tail protected and allows heat to reach the body cavity efficiently. If you split the lobsters beforehand, place them cut-side down.
-
Cover the pot with a tight-fitting lid. Start your timer immediately. Consistent steam generation depends on a sealed environment.
-
Keep the heat at medium-high. You want vigorous steam, not a gentle trickle. If you see water starting to boil around the edges, reduce heat slightly, if the pot is boiling aggressively, you might be losing water too quickly.
Monitoring and Timing Your Lobsters
Once your lobsters are steaming, resist the urge to peek constantly. Every time you lift the lid, you release steam and lose heat. You’re essentially resetting your timer.
Set a reliable timer. Use your phone, an oven timer, or a kitchen timer. Don’t guess or rely on eyeballing. Start timing from when you first cover the pot.
Check water level at the halfway point if you’re cooking large lobsters (3+ pounds). If the water has evaporated significantly, add a small amount of boiling water along the pot edge, never add cold water, as it’ll drop the temperature.
At the minimum time for your size range, prepare to check doneness. For a 1.5-pound lobster, check at 13-14 minutes. For a 3-pound lobster, check at 22 minutes. This is covered in detail in the next section.
Trust the thermometer if you have one. If you’ve got an instant-read meat thermometer, insert it into the thickest part of the tail (the meat, not through the shell) without touching bone. 145°F (63°C) internal temperature is the target. This removes guesswork entirely.
Determining Doneness: Signs Your Lobster Is Perfectly Cooked
Knowing when your lobster is done separates amateur cooks from consistent winners. Multiple indicators work together: don’t rely on just one.
Visual and Physical Indicators of Doneness
Shell color: This is the least reliable indicator, but a helpful reference point. A live lobster is greenish-brown. A fully cooked lobster shell turns bright red or orange-red. But, shell color can vary based on the lobster’s pre-cooking diet and genetics. Some lobsters turn red quickly: others take longer. Don’t use color as your primary check.
Meat appearance: This is much more reliable. Crack open the tail and look at the meat. It should be opaque throughout, no translucent or whitish, gelatinous appearance. If you see any glassy or partially transparent tissue, the lobster isn’t done. The meat should be firm but not rubbery: if it breaks apart into dry chunks, you’ve overcooked.
Tail pull test: Grab the base of the tail and try to wiggle it. On an undercooked lobster, it’ll feel somewhat flexible and connected. On a perfectly cooked lobster, the tail will pull away from the body cleanly with gentle pressure. This isn’t foolproof, different cooking methods and sizes vary, but it’s a useful quick indicator.
Meat firmness: If you poke the tail meat with a fork, fully cooked meat will resist and bounce back slightly. Undercooked meat feels soft and doesn’t have that resilience.
Visual check location matters: Always check the thickest part of the tail, where the body connects. This is the last part to cook. If the meat is opaque and set there, the rest of the lobster is definitely done.
Temperature and Internal Checks
If you want to eliminate guesswork, use temperature as your standard.
The thermometer method: Insert an instant-read meat thermometer into the thickest part of the tail without touching bone or shell. Aim for 145°F (63°C). This is the USDA-recommended safe internal temperature for seafood. At this temperature, the meat is set and safe, but not overcooked.
Why this works: Temperature is objective. You remove the variables of visual interpretation, different lobster genetics, and cooking method variations. If you’re cooking multiple lobsters and want consistency, this is your best bet.
Residual cooking: After you remove a steamed lobster from heat, its internal temperature will rise slightly, maybe 2-3°F, due to carryover cooking. Some cooks pull at 142-143°F to account for this, but the difference is minimal. Pull at 145°F and you’re safe.
If you don’t have a thermometer: Use the visual checks described above. The tail meat should be completely opaque, firm to the touch, and pull cleanly from the body. If all three of these are true, your lobster is cooked through.
Common Steaming Mistakes to Avoid
Small errors compound into mediocre results. Here’s what derails most home cooks, and how to avoid it.
Overcooking and Undercooking Issues
Overcooking: This is the most common mistake. A few extra minutes transforms tender meat into a rubber-like texture that’s impossible to recover. Overcooking also dries out the meat, killing the sweetness that makes lobster special.
Prevention: Set a timer for the low end of your size range (12 minutes for a 1-pound lobster, 18 for a 1.75-pounder) and check. You can always add 2-3 more minutes if needed, but you can’t undo overcooking.
Undercooking: Less common but equally frustrating. Underdone lobster meat has a translucent, gelatinous texture that’s unappetizing and potentially unsafe. The proteins haven’t set, and the flavor is muted.
Prevention: Don’t rush. Use the timing guidelines as minimums, not targets. Always check the thickest part of the tail. If you’re uncertain, add 3-4 minutes and recheck rather than serving undercooked meat.
Uneven cooking: You’ve got a 1.5-pound and a 2.5-pound lobster in the same steamer. The small one will be perfect: the large one will be undercooked. Or they’re stacked, so one gets heat from above and below while the other gets heat from the sides only.
Prevention: Steam similar-sized lobsters together. If you must cook different sizes, add extra time based on the largest specimen. Never stack lobsters.
Water and Salt Management Tips
Insufficient water: Running out of water halfway through cooking kills steam production. Your lobster finishes cooking via residual heat rather than active steam, and you lose timing consistency.
Prevention: Start with 1-2 inches of water and check the level at the halfway point for large lobsters. Keep a kettle of boiling water nearby to top off if needed. Add it along the pot edge, not over the lobsters.
Too much water: Excessive water boils over, makes your pot unstable, and creates hot water splashing. It also increases the risk of water contacting the lobsters directly, which is technically boiling rather than steaming.
Prevention: Stick to 1-2 inches. More is not better.
Adding salt: Many cooks add salt to the steaming water, thinking it improves flavor. It doesn’t meaningfully change the lobster’s taste, the meat isn’t in direct contact with the water. Salt can cause mineral buildup on your equipment. Skip it.
Prevention: Save salt for melted butter or seasonings after cooking. It’s more flavorful and more effective.
Water temperature inconsistency: If you’re adding cold water to top off, you’re temporarily dropping the temperature and throwing off your timing. Your lobsters will take longer to finish.
Prevention: Keep a kettle of boiling water on a burner nearby. If you need to top off, use boiling water only. Add it along the edge, not over the lobsters.
Pro Tips for Restaurant-Quality Results
These aren’t necessary for decent lobster, but they’re the details that separate good results from exceptional ones.
Advanced Techniques and Flavor Enhancement
Brine the water (optional): Mix 1/4 cup salt per gallon of water. This mimics ocean conditions more closely and can enhance the lobster’s natural saltiness. It also seasons the meat more evenly throughout. It’s a subtle improvement, not dramatic, but restaurants use this technique for a reason.
Add aromatics to the steam: Throw a handful of seaweed or kelp into the steaming water. You can also add a few star anise, bay leaves, or peppercorns. The steam carries these flavors to the lobster’s exterior. It’s a faint enhancement, but measurable if you know what to taste for. Remove any solids before adding your lobster to prevent them from sticking to the shell.
Finish with compound butter: While the lobster cooks, prepare a compound butter. Mix softened butter (room temperature) with fresh herbs, tarragon, chives, or parsley work brilliantly, plus a pinch of sea salt. Chill it. When your lobster is done, place a pat of compound butter in each of the main cavities (body and tail). It melts into the warm meat and elevates the dish dramatically. This is a technique that howto guides often underemphasize, but it’s genuinely game-changing.
Use a two-tier steamer: If you’re cooking multiple lobsters, a two-tier bamboo or metal steamer lets you stack them (carefully) and cook more efficiently. The steam circulates around both tiers equally if you space them properly. This is especially useful if you have limited burner space.
Pre-chill your serving plates: While the lobster cooks, place your serving plates in a warm (not hot) oven at 200°F (93°C). When you plate the lobster, it stays warm longer. Cold plates kill the lobster’s temperature quickly.
Invest in a good thermometer: An instant-read meat thermometer removes the guesswork entirely. Look for one with a thin probe (thin probes read temperature faster and require smaller insertion holes). This is one of the best investments for consistent results across multiple cooks.
Let it rest (briefly): After removing your lobster from steam, let it rest for 2-3 minutes before serving. This allows the internal temperature to stabilize and distributes heat evenly. You’ll lose a tiny bit of temperature, but the texture improvement is worth it.
Source quality lobster: This seems obvious, but lobster quality varies significantly. Fresh, live lobsters from reputable suppliers taste noticeably better than frozen or warehouse-stored specimens. Ask your fishmonger about sourcing. Lobster caught recently and kept in proper tanks will reward your cooking effort with superior flavor.
For comprehensive gaming setup tutorials and streaming guides that parallel the precision needed for cooking, HowTo Geek covers similar detailed instruction formats that help readers master complex setups step-by-step. Similarly, detailed walkthroughs and long-form guides on platforms like Shacknews offer the kind of thorough breakdowns that make difficult topics accessible, the same philosophy applies to perfecting your lobster cooking technique.
Conclusion
Steaming lobster is a learnable skill, not a mystery. Master the timing for your lobster’s weight, set up your equipment properly, and verify doneness with multiple indicators, primarily the thermometer or visual checks of the tail meat. The differences are tangible: properly steamed lobster has a tender, buttery texture and concentrated sweetness that boiling rarely achieves.
Your first attempt might not be perfect. That’s fine. Jot down notes on timing, water level, and any variations from your setup. The next time you cook lobster, you’ll have a baseline. After two or three cooks, you’ll develop an intuition for when it’s done. After that, consistency becomes automatic.
Start with medium-sized lobsters (1.5-2.5 pounds) while you build confidence. They’re forgiving enough that slight timing errors don’t ruin the meal, but large enough to provide satisfying portions. Once you’ve nailed those, scaling up to larger specimens or cooking multiple lobsters at once becomes straightforward.