Table of Contents
Are you tired of dealing with the complexities of a controller-based wireless network? Well, look no further! In this article, I’ll guide you through the step-by-step process of converting your Air-LAP1142N-A-K9 access point to standalone mode. With just a few simple steps, you’ll have your access point up and running independently in no time.
Gone are the days of relying on a central controller for your wireless network management. By converting your Air-LAP1142N-A-K9 to standalone, you can enjoy the flexibility and freedom that comes with managing your access points individually. Whether you’re looking to simplify your network architecture or need more control over specific deployment scenarios, this conversion process is here to meet your needs.
So, if you’re ready to take charge of your wireless network infrastructure and unleash its full potential, join me as I walk you through the detailed instructions on how to convert an Air-LAP1142N-A-K9 access point to standalone mode.
Air-Lap1142n-A-K9 Convert to Standalone
Before proceeding with the conversion process, it’s essential to ensure that your Air-LAP1142N-A-K9 access point is compatible with standalone mode. This step will help you avoid any potential issues during the conversion. To determine compatibility, follow these steps:
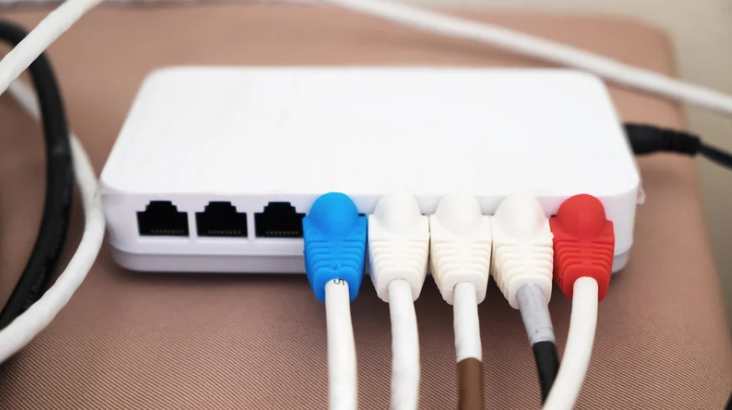
- Check the model number: Verify that your access point is indeed an Air-LAP1142N-A-K9 model. Look for this information on the label or packaging of your device.
Example: The model number should be clearly labeled as “Air-LAP1142N-A-K9” on the back panel of your access point. - Research compatibility: Conduct thorough research online or consult Cisco’s official documentation to confirm that this specific model supports standalone mode conversion.
Example: Visit Cisco’s website and search for product specifications or user manuals related to Air-LAP1142N-A-K9 to find detailed information about its compatibility options.
Obtaining the Necessary Equipment for Conversion
To successfully convert your Air-LAP1142N-A-K9 access point to standalone mode, you’ll need a few additional equipment and tools. Here are some essentials:
- Power source: Ensure that you have a stable power source available near your access point during the conversion process.
Example: Connect your access point directly to a power outlet using an appropriate power cable or use a Power over Ethernet (PoE) injector if applicable. - Console cable: Obtain a console cable that allows you to establish a connection between your computer and the access point via its console port.
Example: A standard USB-to-Serial console cable can be used to connect your computer’s USB port with the serial console port on the back of the access point. - Terminal emulation software: Install terminal emulation software on your computer, such as PuTTY or Tera Term, to establish a console connection with the access point.
Example: Download and install PuTTY from the official website to set up a secure SSH session or serial connection with your access point. - Standalone firmware: Download the standalone firmware image for Air-LAP1142N-A-K9 from Cisco’s website or obtain it from a trusted source.
Example: Visit Cisco’s software download section and search for the latest standalone firmware version compatible with Air-LAP1142N-A-K9. Ensure that you select the correct firmware based on your specific hardware revision.
Configuring TFTP Server
Connecting the TFTP Server
Before we can begin configuring the TFTP server, we need to establish a connection to it. To do this, follow these steps:
- Ensure that your computer and the TFTP server are connected to the same network.
- Open a web browser on your computer and enter the IP address of the TFTP server in the address bar.
- If prompted, enter any required credentials to access the server.
Setting Up the TFTP Software
To configure a TFTP server, you’ll need specialized software that allows you to manage file transfers over a network. Here’s how you can set up the software:
- Download and install a reliable TFTP software such as SolarWinds TFTPServer or tftpd32.
- Launch the installed software on your computer.
- Configure any necessary settings such as specifying a root directory for file transfers or enabling security features if required.
In conclusion, converting an Air-LAP1142N-A-K9 access point from lightweight mode to standalone opens up a world of possibilities for enhancing your wireless network infrastructure. The step-by-step process provided in this article ensures a successful conversion with minimal disruption. Embrace the freedom and customization offered by standalone mode as you take full control over your wireless environment.