Table of Contents
- How do I screen record?
- Does iPhone 10 have screen recording?
- How do I record my phone screen with sound?
- How do I record my screen with sound?
- Does iPhone XR have screen recording?
- How can I record my iPhone XR for free?
- How do you screenshot a video on iPhone?
- How do I record my iPhone screen with internal sound?
- How do you record your screen on an iPhone 11?
- What app do you use to record your iPhone screen?
- How long can you record screen on iPhone?
- How do you take a screenshot of a video?
- How do I record a secret video on my iPhone?
- How can I record my screen for free?
- How do I use video on iPhone?
- Why is there no sound when I record video on my iPhone?
- Which is the best screen recorder app?
- How do you record a video on your phone screen?
- Do screen recordings have sound iPhone?
- Can iPhone record XS screen?
- Where is the control panel on iPhone XR?
- How long can an iPhone XR record video?
- How can I record a call on my iPhone without an app for free?
- Does Apple provide call recording?
- How can I record my screen with audio for free?
- How do I turn on screen recording settings?
- What is the best free screen recorder for iPhone?
- Is there a screen recording app?
- Can I screen record for 1 hour?
- Does screen recording have sound?
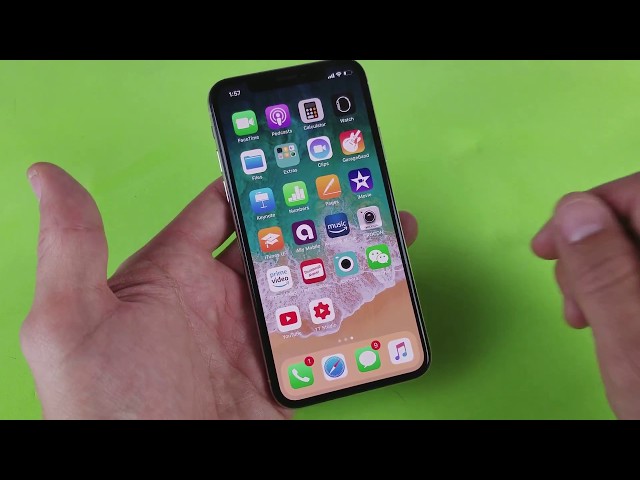
Learn how to record your screen on an iPhone X by following these simple steps. With this handy guide, you’ll be able to capture all the action on your screen and share it with others.
How do I screen record?
Most iOS devices, including the iPhone and iPad, support screen recording. It enables you to quickly take films or photographs of whatever is on your screen. Screen recordings may be used to record lessons, how-to films, gaming sessions, and other activities.
To record a screen on an iPhone X, follow these steps:
- Go to the app or website you want to record from.
- Swipe up from the bottom of your screen to access the Control Center.
- Tap and hold the Screen Recorder icon in the top right corner.
- Tap start recording, and a timer will appear at the top of your device’s display to indicate that your recording has started.
- When you’re through recording, hit stop in the same location or any other location before moving on to other chores.
You may also access your screen recordings from the Settings menu. > Photos& Camera> Screen Recording, where you may save all of your recordings for later use.
Does iPhone 10 have screen recording?
Yes, the answer is yes. With the introduction of iOS 11, Apple integrated screen recording to the iPhone 10. Screen recording is a function that enables users to record anything is shown on the screen of their device, such as applications, websites, games, and so on.
On iOS 10, accessing this capability is as easy as swiping up from the bottom of the screen and tapping the “Screen Recording” button. Before pressing the record button, you may select to record your full screen or only a piece of it. You may also adjust audio control and if your microphone should be captured with the video. When you’re through recording, you can see your video in the Photos app or your device’s Gallery, and share it anywhere you like.
How do I record my phone screen with sound?
On an iPhone X or later model, recording your screen with sound is a straightforward procedure. To begin, launch the Settings app and go to “Control Center.” You may change the length of time you can access Control Center in this area. Then, go to the “Customize Controls” section and add “Screen Recording” to your Control Center.
After you’ve enabled screen recording in Control Center, you can begin recording by dragging down from the top right corner of your iPhone X or later model. Depending on the model of your iPhone, you should notice a little microphone and circle indicator. This is the record button, which gives you rapid access to begin recording.
When you click this button and start recording, it will allow both video and audio recordings. To turn off audio recordings to increase performance, just click on the same icon again and toggle the audio off by hitting Mute “in the menu’s bottom left corner. When you’re completed, click Done” to save it to the Photos app, as well as other social networking applications like Facebook or YouTube if preferred.
How do I record my screen with sound?
It’s simple to record your iPhone X’s screen with sound. To do so, go to the control center and activate the screen recording option. Go to Settings > Control Center > Customize Controls, then press the green + button next to Screen Recording. After you’ve enabled the capability, access Control Center by sliding up from the bottom of your iPhone X’s screen and selecting Screen Recording. Then you should see an audio icon. When you begin recording, sound will be captured as well.
You may also use an iPhone X to access sound when shooting a gaming video or any other sort of video. To do so, open Settings > Control Center and enable the Record Video with Audio option, which will allow you to record audio while playing a game or watching a video in any app that supports video recording. Finally, decide whether you want to utilize an integrated front-facing microphone or external headphones for your audio recordings.
Does iPhone XR have screen recording?
Yes, the iPhone XR can record your screen. This is a feature that has been available on iPhones since iOS 11, and it is compatible with all device models after the iPhone 6S.
To record your screen, swipe down from the top right corner of your display to activate Control Center and record your screen. Hold down the recording card and choose Screen Recording “to begin recording the screen of your phone. Then, at the top of your screen, touch the red Screen Recording bar “to stop the recording. The video will be stored under Photos > Media Types > Videos in the Photos app for easy access and sharing with others.
With these easy steps, you may now record anything is on the screen of your iPhone XR.
How can I record my iPhone XR for free?
The built-in screen recording software on the iPhone XR makes it simple to record the screen. Simply open the Control Center and seek for the Screen Record” item at the bottom of the list to record your iPhone XR screen for free. When you tap it, you should get a window with a few recording choices. You may choose whether or not to show touches, activate your microphone, or display a countdown. Once everything is in place, hit “Start Recording” to start recording whatever is on your iPhone XR’s screen.
When you’re done recording, go back to Control Center and click “Stop Recording” to save it to your smartphone. The video will then be saved in your pictures app, where you may edit or share it with anyone you choose.
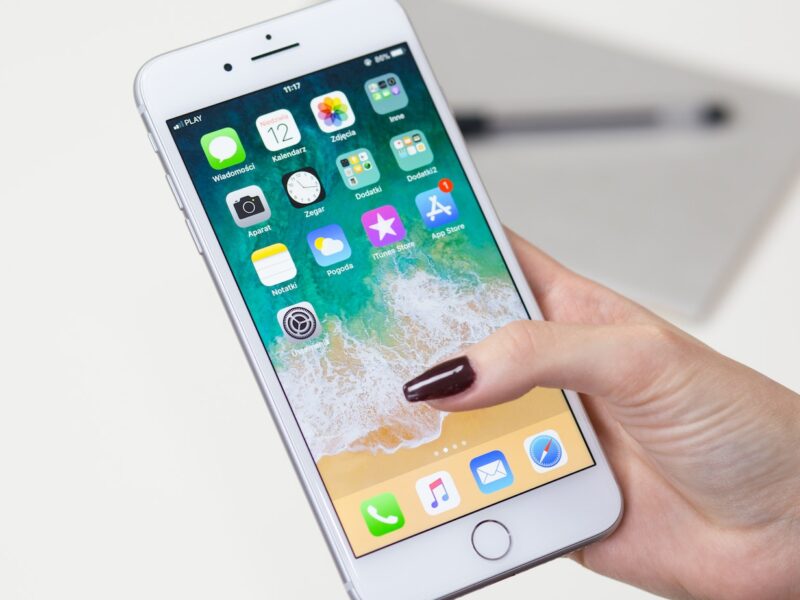
How do you screenshot a video on iPhone?
Things might become a little tough when it comes to capturing a screenshot of a video on an iPhone. You may capture a still picture of the video while it’s playing on certain models by pushing both the Home and side volume buttons at the same time. This, however, may not work on all iPhones. If you have an iPhone X or later model, for example, the technique for capturing screenshots has changed.
To capture screenshots of videos on an iPhone X or later device, first push and release the Side button, then swiftly press and release the Volume Up button. This will take a real-time still image of your video. Once captured, your screenshots may be seen in your Photos app under the ‘Screenshots’ album. Remember that you may utilize Apple’s built-in screen recording capability instead if you wish to record more than simply a static snapshot of your screen.
How do I record my iPhone screen with internal sound?
In three easy steps, you may record your iPhone’s screen with internal sound. To begin, on an iPhone X or later, slide up from the bottom of the screen to access the Control Center. Second, hold down the Screen Recording symbol, which is a dot enclosed by a circle, until it grows. Third, touch ‘Internal Sound,’ then ‘Start Recording,’ to start recording your screen with internal sound.
You may record any talk or sound that comes out of your iPhone while recording using the Internal Sound option. This is very handy for capturing video chats, gameplays, lessons, and other recordings that need sound. When you’ve finished recording your screen with internal sound, you may find it in the Photos app under Screen Recordings“.
How do you record your screen on an iPhone 11?
Screen recording on an iPhone 11 is a straightforward technique. To begin, ensure that you have the most recent version of iOS installed. After that, swipe up from the bottom of the screen to access the Control Center. The Control Center will appear, and it will be separated into two sections: music on the right and phone settings on the left.
The Screen Recording symbol, which looks like a white circle with a dot in it, is found in the lower-right corner of the left side of your Control Center on iPhone 11. To begin recording your screen, tap this symbol. To add audio to your recording, just press and hold this symbol for a few seconds until choices for Microphone Audio” as well as “Start Recording” and “Cancel” appear. Simply choose “Microphone Audio” to record with audio or “Start Recording” to record without audio.
When you’re done, swipe down from the top of your device’s screen to expose the same Screen Recording symbol – this time in red – and press it to stop recording your screen.
What app do you use to record your iPhone screen?
Recording the screen of your iPhone is a terrific way to record memories, share ideas, and create entertainment. Recording your screen on an iPhone X is as easy as installing and opening an appropriate app.
To record your iPhone X’s screen, download the Screen Recorder software from the App Store.
Screen Recorder was created with simplicity in mind, so setting up and taking film is a snap. All that is required is to:
- Activate the app
- Modify settings such as resolution up to full HD and audio input option external microphone or internal microphone
- Press record
Once captured, film may be simply shared through AirDrop or by directly uploading it to YouTube or other social networking networks. Screen Recorder is certainly worth exploring if you’re searching for a simple method to record memories or communicate ideas on the road.
How long can you record screen on iPhone?
Screen recording on an iPhone X or later is an excellent method to record video of your phone’s screen. Apple’s most recent iOS version, released in 2018, now enables users to record their screen with a few touches. Screen recordings may last up to 30 minutes.
When recording your screen, you may choose which audio to record by selecting choices such as “No Audio,” “Internal Audio,” and “External Audio.” There are also numerous video quality settings, ranging from HD to full 1080p HD definition. You may also select whether to record audio from the microphone or not.
Overall, capturing your iPhone X’s screen is a quick and uncomplicated operation. The maximum duration of any single recording is 30 minutes, which should be sufficient for most purposes. You’ll get a terrific final product with the numerous audio and video quality settings.
How do you take a screenshot of a video?
It’s shockingly simple to take a screenshot of a video on an iPhone X. To begin, open the video and pause it at the place you want to capture as a screenshot. Then, on the right side of your phone, press and hold the Power button while simultaneously clicking the Home button. After you’ve done this, you should see a screenshot preview in the bottom-left corner. If this is what you intended to record, just click Done or another option. The photograph will be kept in your Photos app, where it may be altered or shared.
You may also take a screenshot while viewing a video by pressing both volume buttons at the same time. This strategy, however, may not work as effectively with certain earlier versions of iOS since it is less stable than simultaneously tapping the Power and Home keys.
How do I record a secret video on my iPhone?
Making a covert video on an iPhone X or later is now simpler than ever. In less than two minutes, you can record any action on your iPhone using the built-in Screen Recording capability.
To begin, open the Settings app on your iPhone and then choose “Control Center.” Select “Customize Controls” and then scroll down until you find the “Screen Recording” option. To add this function to your Control Center, tap the green + button next to it. Next, slide up from the bottom of your screen and 3D Touch or long-press the Screen Recording button that displays in your Control Center if you don’t have 3D Touch.
Finally, touch “Start Recording,” and your iPhone will begin recording a video of whatever is on its screen. Swipe up from the bottom and hit Stop, or touch the Screen Record symbol in your status bar and press Stop.
How can I record my screen for free?
Recording your screen for free on an iPhone X is simple and takes just a few steps. With iOS 11 and above, Apple has included screen recording functionality, making it simpler to capture the visuals of applications, games, films, and other media right from your device.
To begin screen recording on an iPhone X, access the Control Center by sliding up from the bottom of your device’s display. Then choose Screen Recording “icon. After that, a three-second countdown will show before your phone starts recording the content on its display.
Launch the Photos app on your smartphone and go to the new Recordings tab to retrieve or analyze recorded content “iCloud album. You may see any recordings produced using the Screen Capture program on your iPhone X, modify them, and share them with others from this page.
Finally, if you wish to stop recording at any point throughout the process, just open Control Center and hit the Screen Recording button one more time. This will cease recording instantly with no more input necessary. With these instructions, you may immediately record everything that happens on your device’s screen for free ḿƖʃḧ ƒōŗŧũɲḗ.
How do I use video on iPhone?
It’s simple to record a video on your iPhone X, and it only takes a few steps.
- Swipe up from the bottom of the screen to access the Control Panel.
- To begin recording, open the Control Panel and hit the grey recording button in the bottom left-hand corner.
- Before you begin recording, you will be asked to approve a few permissions. Then, by pressing “Start Recording,” you may begin recording.
- To stop the recording, either touch or press and hold the blue status bar at the top until you get the choice to stop recording.
- When you’re through with your video and want to save it, just hit the Stop button in the upper right-hand corner of your screen.
- You may then save your video to your camera roll or instantly publish it to social media sites like YouTube and Instagram.
Why is there no sound when I record video on my iPhone?
You may have noticed that your recorded video does not have any sound when you record it on your iPhone. This is because the Camera app’s default settings disable the microphone while capturing video. This is done to prevent any unwanted background noise when recording.
Open the Camera app and go to Settings by pressing on the cog symbol 🔧 in the upper left corner of the screen. Then scroll down and turn “Microphone” on. When utilizing your iPhone’s camera, you will be able to record audio along with your video.
If you wish to record your screen using a third-party program, be sure to check its settings for audio options as well. Some applications provide audio controls that let you mute or unmute noises while recording.
Which is the best screen recorder app?
It might be difficult to choose the finest screen recorder software for your iPhone X. Each app has its own set of functions, making it tough to decide which is ideal for you. However, there are some general principles to follow while searching for the best screen recorder software.
- First, determine whether the app enables you to record from both the front and back cameras at the same time. This allows you to record your face as well as what’s on your screen at the same time.
- Furthermore, ensure that the software supports recording at numerous resolutions and frame rates so that your output looks great.
- Finally, see whether the program has additional editing options like cropping, annotations, and other image/video tweaks so you may further personalize your recordings.
With these pointers in mind, you’ll be able to pick a great recording app for your iPhone X.
How do you record a video on your phone screen?
Recording a video on your phone screen is a convenient method to record and share gaming, presentations, or other activities. Fortunately, shooting a video of your iPhone X’s screen is simpler than you may expect.
To begin recording your phone screen on an iPhone X, access the Control Center by sliding down from the upper right corner of the screen. Tap and hold on the recording symbol, which looks like a circle with a dot in the middle, to be prompted to select whether or not to include sound in your recording. Once chosen, hit “start recording”, and your iPhone X will begin recording what’s on your display, including audio if it was previously enabled.
To stop recording, swipe up from the bottom of the screen and choose “stop” or click “done”. Your completed video will be preserved in photographs for future reference.
Do screen recordings have sound iPhone?
The quick answer to the question ‘Do iPhone? screen recordings have sound?’ is yes. Users of the iPhone X may record their displays with sound. To do so, customers must open the Settings app and pick ‘Control Center’ from the list of choices. They may then touch ‘Customize Controls’ and ensure that the Screen Recording toggle is turned green.
After that, pushing hard on the left side of the screen will bring up the Control Center, where an icon for Screen Recording with a microphone symbol will appear. Users may begin recording their screen with audio included by tapping on this icon.
Can iPhone record XS screen?
The iPhone XS may record your screen and any actions that occur on it. This is a really handy tool for making lessons or training materials, and it can be done with a few touches of the screen.
To record the screen of your iPhone XS, first launch the Control Center by sliding down from the top right corner of the device’s home screen. Once open, pick Screen Recording and then set a time limit for your recording session. When you click “Start Recording” at the bottom of the control center page, the recording will begin. Once completed, your videos are immediately stored in Photos and may be shared or altered at any time.
Where is the control panel on iPhone XR?
The Control Panel is a fast access location in the top right corner of the iPhone XR. It gives you quick access to your most often used settings and functionalities, such as Wi-Fi, Bluetooth, Airplane Mode, Do Not Disturb mode, and more. Simply slide down from the top right corner of your phone to access it. After that, you’ll see the Control Panel, where you may quickly and simply change any of your phone’s settings.
With a few touches, you can also record your screen on the iPhone XR’s Control Panel. To do so, open the Control Panel and go to Screen Recording. Tap Start Recording from there, and a three-second countdown will show before recording starts. When finished recording simply tap Stop Recording to end it. Your recorded videos can then be accessed from the Photos app or sent through Messages or shared through social media directly from the control panel menu.
How long can an iPhone XR record video?
The maximum video recording duration on an iPhone XR is roughly 30 minutes. However, if you wish to record longer movies, just change the settings on your device. When you cut or divide the video, you may make two independent recordings of up to 30 minutes each. Furthermore, the iPhone XR will continue to record until it runs out of storage space or battery life.
Also, although the phone records at 4K UHD quality at 24 frames per second, depending on your device’s processing speed and other circumstances, it may record at a lesser resolution or frame rate, such as HD 720p at 30 frames per second, resulting in a longer overall recording time. Additionally, while recording with audio enabled, keep in mind that this will lower the total maximum duration of your recordings since audio data takes up more storage space than video data.
How can I record a call on my iPhone without an app for free?
You can record audio and video calls on your iPhone without using an app by using the built-in functionality. To record a call on your iPhone, activate the built-in Call Recording function. To do so, open the Phone app, go to Settings, and then scroll down to Call Recording. Toggle the switch next to “Allow Call Recording” to the on position to allow it. When you activate it, you’ll see a new symbol in the top-right corner of the screen that looks like a microphone with two arrows around it when you make or receive a call on your iPhone. If you press this icon during a call, it will immediately begin recording and save the call as an audio file in your library. You can also use FaceTime to record incoming audio calls by tapping the same microphone symbol in the bottom-left corner of your screen.
Furthermore, if you want to record video calls without using an app, there is a workaround:
- To record what is occurring on your phone’s display when making or receiving Facetime/Skype calls or any other sort of video call, use Apple’s screen recorder from Control Center. On iPhone X devices, go to ‘Settings,’ then ‘Control Center,’ and set ‘Access Within Apps’ to ‘On’. After that, pull up Control Center from within any app when making/receiving video calls by swiping down from the top right corner if using FaceTime or swiping down from the top left corner if using Skype and tap the Screen Recording button that looks like a circle with two semicircles inside to begin saving whatever is displayed on your iPhone’s display as it happens.
Does Apple provide call recording?
On iPhones, Apple does not provide the opportunity to record audio calls. Because the ability to record phone calls on an iPhone is restricted by local and federal legislation, Apple does not have a built-in call recording option.
However, there are third-party applications available that enable iPhone users to record audio calls. The majority of these applications require users to sign up for a membership or pay for individual recordings.
Furthermore, in order to comply with local regulations, some of these applications may need both participants in the discussion to be aware of and agree to the recording beforehand. Before utilizing any third-party app that offers this service, consumers should verify their local regulations.
How can I record my screen with audio for free?
It is feasible and simple to record a screen with audio on an iPhone X for free. You’ll need a suitable app that can record both video and audio to record your screen with audio. This capability is available for free in numerous applications on the App Store, including Vina Recorder, AZ Screen Recorder, QuickTime Player, and others.
Once you’ve downloaded an appropriate app, follow the steps below to begin audio-recording your screen:
- Launch the app on your phone and pick ‘Record’ or something similar.
- Adjust the recording options to your liking, such as frame rate, resolution, and so on.
- Click the ‘Start Recording‘ button.
- Before recording starts, a three-second countdown will begin.
- When you’re through recording, click the ‘Stop Recording‘ button.
- Your video will be stored in the app’s media gallery or library.
- Once saved, it may be shared online with friends or exported through email or other file sharing services like Dropbox or Google Drive.
With these easy steps, you can now simply record your screen with audio on an iPhone X for free.
How do I turn on screen recording settings?
Users may record material on their iPhone X’s screen using the screen recording settings. To switch on the function, you will need to launch the Settings app, then pick “Control Center”. Choose “Customize Controls” and then scroll down to the “Screen Recording” option. Tap the green plus symbol to the left of this option, followed by “Done” in the upper right corner of your screen.
Swiping up from your home screen or lock screen will now reveal a Screen Recording button in your Control Center. After pressing this button, you will be asked whether you want your microphone audio to be recorded with your video or not. After you’ve made your choice, touch “Start Recording” to begin recording the contents of your iPhone X.
What is the best free screen recorder for iPhone?
There are various factors to consider while searching for the best free screen recorder for iPhone. First, select a tool or app that allows you to modify your recording quality so that you may record video at the greatest resolution possible. You should also ensure that the recorder you choose is compatible with your device and operating system. Additionally, seek for an app that has editing tools for removing undesirable sections of the video, notes and text captions, and audio mixing capabilities.
The following are some popular free screen recorder applications for iPhone:
- QuickTime Player,
- EZVid Screen Recorder,
- Screen Recorder Lite, and
- iRec Screen Recorder.
All of these features make it simple to record high-quality video on any iPhone running iOS 11 or later. Because it comes preloaded with the iOS operating system, QuickTime Player is an excellent alternative if you are already acquainted with Apple’s applications. EZVid Screen Recorder has editing capabilities such as cropping and cutting, but Screen Recorder Lite features a simple user interface with annotation options such as arrows or boxes during recording. Finally, iRec Screen Recorder enables users to change their bitrate while recording in order to optimize the quality/size balance of their films to match their demands.
Is there a screen recording app?
Yes, there are a number of screen recording applications for the iPhone X. QuickTime Player, Apple’s native screen recording software, is the easiest and most dependable alternative. With this software, you may easily record your iPhone’s complete screen.
You may also record the screen of your iPhone X using third-party applications like ScreenFlow, Reflector 2, and AirServer. These third-party programs enable you to store recordings in multiple file formats and add text or voice comments during or after the recording. While QuickTime Player is free, many of these third-party programs need a premium membership to utilize all of their capabilities.
Before utilizing any of these tools, ensure that your device’s version is compatible and updated to the most recent version of iOS.
Can I screen record for 1 hour?
The answer to this question is dependent on the sort of gadget you have, as well as its storage capacity. In general, iPhones may be set to record for up to an hour without running out of storage capacity. Some newer models, however, may have extended recording times.
To see whether your phone can record for more than one hour, open the Settings app and click to the Screen Recording choices. Before beginning your screen recording session, you may choose several variables such as the duration and quality of the recording. It’s worth noting that better resolution recordings need more storage space than lower quality ones. As a result, if you wish to record for longer lengths of time on an iPhone X or later model, utilize lower resolutions.
Does screen recording have sound?
Yes, when you create a screen recording on an iPhone X, sound will be recorded. When you begin recording, hold down the side button and choose ‘Screen Recording’ from the list of choices. A little countdown may show before the recording begins, depending on your device settings. When this happens, all audio from your device’s microphone will be included in the video file.
If you don’t want to capture background noise or other sounds, for example, just switch off audio before beginning the screen recording. To do this, go to ‘Settings > Screen Recording > Microphone Audio’ and toggle it to Off. This manner, only graphics will be recorded during iPhone X screen recordings.