Table of Contents
- How do I transfer photos from iPhone to memory stick without computer?
- How do I backup the photos on my iPhone?
- How do I save my iCloud photos to an external hard drive?
- How do I backup my Photos without a computer?
- Where are Apple Photos stored?
- Why cant I move Photos from Mac to external hard drive?
- How do I change where my iPhone backup is stored?
- How do I backup my iPhone without iCloud?
- How can I backup my iPhone Without iTunes?
- Can I backup my iPhone to a Seagate external hard drive?
- How do I backup my iPhone to my Seagate hard drive?
- How do I connect my Seagate hard drive to my iPhone?
- Can I connect a USB stick to my iPhone?
- Is there a memory stick for iPhone?
- How many photos can 64GB hold?
- Where can I store my iPhone photos?
- Are photos backed up in iPhone backup?
- Does backing up iPhone save photos?
- How do I download more than 1000 Photos on iCloud?
- Can I delete Photos from iPhone and keep on iCloud?
- How do I delete Photos from iPhone but not iCloud?
- How do I transfer photos from camera directly to external hard drive?
- Can I transfer photos from camera to external hard drive?
- Can I use an SD card as a hard drive?
- What is the difference between Pictures and Photos on Mac?
- Are Apple Photos free?
- How do I change my photo library location?
- How do I move photos library to external hard drive Mac?
- Does Mac Time Machine backup photos?
- Why cant I save files to my external hard drive Mac?
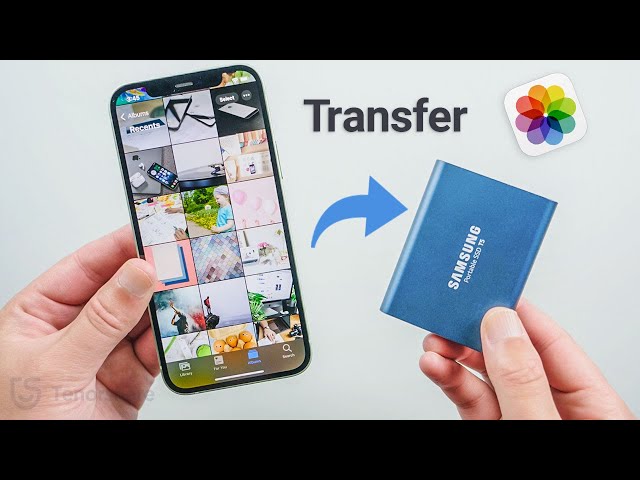
If you’re looking for an easy way to backup your iPhone photos to an external hard drive, you’ve come to the right place. In this blog post, we’ll show you how to do it in just a few simple steps.
How do I transfer photos from iPhone to memory stick without computer?
It is possible to transfer photos from an iPhone to a memory stick without needing a computer. The procedure is really rather easy and does not need any technical skills or extra software. All you need is your iPhone, the memory stick, and a USB power adaptor from Apple.
To begin, connect your memory stick to the USB connection on the Apple USB power converter. Then, using a Lightning to USB connection that is offered separately, connect your iPhone to the other end of the converter. You should notice that your iPhone and memory stick are both linked.
Finally, on your iPhone, open Photos and pick the photos you wish to transfer. Tap “Share,” then “USB drive.” In a matter of seconds, all of your chosen photos will be copied to the memory stick. You can now effortlessly backup all of your favorite memories and share them with family or friends whenever you choose.
How do I backup the photos on my iPhone?
Backing up photos from your iPhone to an external hard drive is an excellent approach to safeguard your images in the event that your device is lost or damaged. You may save duplicates of your photos on a separate physical device using an external hard drive, providing for safekeeping without depending on the cloud.
To backup your iPhone photos to an external hard drive, follow these steps:
- Connect the hard drive to your computer using a USB-C or micro USB connector.
- Open one of your computer’s file explorer apps and look for the external hard drive in the list of drives.
- On your phone, launch the file browser app and pick the photos you want to backup.
- Inside the file explorer window, just drag and drop these photographs onto the external hard drive folder.
That’s all. You now have secure backups of all your valuable photos on an external storage device.
How do I save my iCloud photos to an external hard drive?
Backing up your iCloud photos to an external hard drive is an excellent approach to assure the safety and security of all of your precious photos and movies. You will need an iCloud account as well as an external hard drive to keep your photos.
To back up your photos and videos:
- Connect your external hard disk to your computer first.
- Launch the iCloud desktop program once connected.
- Before choosing Preferences, sign in using your Apple ID credentials from the application’s menu.
- Select the iCloud Photos tab in Preferences and ensure that Download New Photos& Videos to My PC is checked.
- This page has been chosen. Finally, go through the dialog box offered by the iCloud desktop program to choose the folder where you want to put your files on the external hard drive; this folder should now include all of the photos and videos saved in your iCloud account.
You can simply back up all of your iPhone photos and movies to an external hard drive by following these instructions, giving you peace of mind that they will not be lost or destroyed.
How do I backup my Photos without a computer?
It is now simpler than ever to back up your photos without using a computer. There are many external hard drives available that enable you to effortlessly backup your photos, movies, and other things right from your iPhone or iPad to them. This means you can clear up space on your device while still creating an off-site backup of all your material in case anything goes wrong with it.
An Apple-certified external hard drive, such as the SanDisk iXpand Flash Drive, is the simplest method to backup photos without a computer. This drive enables you to connect it to the lightning connection of your iOS smartphone and transfer data straight from the device to the drive without ever connecting it to a computer. Furthermore, some drives contain an extra USB connector that enables them to be linked directly to a laptop or desktop computer, allowing you to transfer data between the two devices fast and effortlessly. Finally, hard drives have built-in encryption software to keep all of your data safe and confidential.
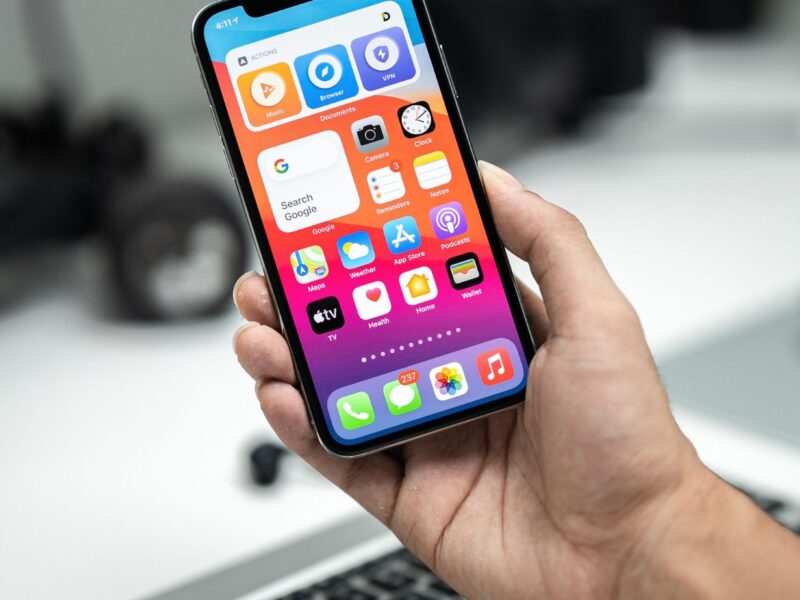
Where are Apple Photos stored?
Apple Photos are kept on your iPhone via the Photos app, which is divided into two sections: Photos and Albums.
All photos taken with your iPhone’s camera are automatically saved in the Photos area by default. You may also manually upload photos and videos to this area from other sources, such as iCloud or your PC.

The Albums area enables you to save photos that are organized by date, place, or even persons. If you have taken a picture and want to edit it or modify how it appears on your smartphone, the Photos app is where you should go.
Simply connect in the drive and use the Apple Photos app to seamlessly transfer all of your photos from an iPhone to an external hard disk. Then, choose all of the photos you want to copy and save them to your external storage.
Why cant I move Photos from Mac to external hard drive?
Moving photos from your Mac to an external hard drive might be difficult if you don’t know how. Fortunately, there are several trustworthy solutions. One of the simplest methods is to utilize the Image Capture software that comes standard with your Mac. With this tool, you can easily choose individual photos and drag them onto your external hard disk.
However, if you have hundreds or thousands of photos, this process may take longer than required and be tiresome. In this scenario, you may find it easier to just connect your iPhone to the external disk via USB connection and transfer the photos that way.
You may also want to explore utilizing Apple’s iCloud or another cloud-based storage solution that allows you to store all of your photos in one location and conveniently access them from any internet-connected device, including your Mac computer and any other devices such as phones, tablets, or laptops.
How do I change where my iPhone backup is stored?
When you back up your iPhone, the data is automatically saved in iCloud or on iTunes, depending on your preferences. However, you may simply save your data on a separate device, such as an external hard drive.
- Make sure your iPhone is connected into your computer through a USB wire.
- In iTunes, choose Preferences from the Edit menu.
- Go to the Devices tab and uncheck “Prevent iPods, iPhones, and iPads from automatically syncing”.
- When you connect your device to the computer, iTunes will not overwrite any existing backups.
- Pick “Back Up Now” from the “Summary” option to save all of your data to an external hard drive rather than iCloud or iTunes.
How do I backup my iPhone without iCloud?
Backing up your iPhone data without iCloud is simple and may be accomplished using an external hard disk. An external hard drive allows you to save all of your iPhone’s photos, movies, music, messages, contacts, and other things on a safe and secure physical device. You may also be certain that none of your personal information will be saved in the cloud.
Connecting an external hard drive to a computer is the first step in backing up your iPhone data without iCloud. Once connected, use Windows Explorer or the Finder software on your computer and create a new folder for your iPhone data backup on the external hard drive. Then, using iTunes, manually sync your device’s photos and other data to the external hard drive. After synchronization is finished, you may detach the device from the computer since all of your vital data has been safely stored up on an external hard drive.
How can I backup my iPhone Without iTunes?
An external hard drive is the appropriate answer if you want to back up your iPhone photos without having to utilize iTunes. Simply connect your iPhone to the external hard drive, pick the photos you wish to back up, and save them immediately into the disk. It simply takes a few minutes and provides safe storage for all of your photos.
Furthermore, with an external hard drive, you won’t have to worry about iCloud storage or losing data due to device malfunctions or crashes. An external hard drive also offers greater storage capacity than iCloud, allowing you to keep all of your photos without worrying about running out of space. This makes it simple to view and share all of your photos as required, while also offering a safe place to keep them.
Can I backup my iPhone to a Seagate external hard drive?
Yes, you may backup up your iPhone data to a Seagate external hard drive. To do this, connect the Seagate external drive to your computer first, and then use the supplied Seagate™ Dashboard program to have your computer identify the drive. You may then launch Apple iPhoto or iTunes and choose devices from the main menu bar, followed by Back Up Now.
This will enable you to backup your iPhone’s photos, contacts, music, movies, and other items to your hard disk. It is critical to remember that before making any sort of backup, you should always ensure that all software packages are up to date. Furthermore, if the Seagate Dashboard software has recently been updated, it may be essential to:
- Remove any earlier versions before upgrading.
- Ensure it correctly detects the device.
How do I backup my iPhone to my Seagate hard drive?
It is simple to backup your iPhone photos to an external hard disk. Connect the Seagate hard drive to your computer using a USB connection first, then use the iTunes program on your computer to make the backup.
Open iTunes and choose your device from the upper left corner of the program window. You’ll discover a Backup this iPhone option under the Summary tab. “Click here and then choose External Hard Drive” from the dropdown menu that displays. Then, from the list of devices, choose the Seagate hard disk and press “Back Up Now” to begin the procedure.
After finishing a backup, detach your Seagate hard drive from your computer and store it somewhere secure for future use. It is recommended that you back up your data on a regular basis, at least once a month or two, to ensure that all of your important files and data are protected from any hardware issues or permanent data losses in the event that something unfortunate happens with your iPhone’s hardware or software system.
How do I connect my Seagate hard drive to my iPhone?
It is easy to connect your Seagate hard drive to your iPhone. First, depending on your iPhone model, you’ll need to acquire the right cable, either a Lightning to USB 3 Camera Adapter or a USB-C to USB Adapter.
Once you’ve found the right cable, connect one end to your phone and the other to your Seagate hard drive.
Then, on your iPhone, run the Photos app and pick the “Back Up Now” option from the Photos menu. This will open a new window where you can choose which external device you want to backup your iPhone photos to. Choose “Seagate Hard Drive” from the list and press the “Start Backup” button. Your photos will now be copied from your phone to your hard disk.
You may alternatively use an app like FileExplorer or iExplorer to see and manage them.
Can I connect a USB stick to my iPhone?
A USB stick can be connected to an iPhone, but only via a third-party device. There are two common ways to do this: utilizing an Apple-approved Lightning to USB Camera Adapter or buying an OTG adapter.
Using the Apple-approved Lightning to USB Camera Adapter, customers may connect any digital camera, such as a DSLR, to the iPhone through a USB connection. This allows users to instantly import photos and movies from their digital cameras into their iPhone’s Photos app, making it simpler than ever to transfer data from digital cameras. The adapter also allows a USB connection from external hard disks and flash drives, enabling users to quickly and conveniently backup their photographs and other files.
OTG adapters, on the other hand, allow users to plug in normal USB sticks without the need for any extra cables or adapters. This allows you to quickly and simply move data between your computer and your phone. There are several models on the market, but they all serve the same purpose:
- to provide an economical solution to connect external storage devices such as flash drives to your phone.
Is there a memory stick for iPhone?
The simple answer is no. Although iPhones lack a built-in memory stick, you may backup your photos and other material from your iPhone using an external hard drive or memory card reader adapter.
To keep data and photos shot with your iPhone, utilize an external hard drive, such as one that links to your laptop via USB connection. Simply open the external hard drive file browser and drag photographs from the iPhone Camera Roll into the specified folder on the hard drive to backup photos.
If you want to back up photos and movies produced with your digital camera straight onto an iPhone, you may use a memory card reader adapter with an SD card. This adapter allows you to place a full-sized SD card into it and then connect it straight into your phone’s lightning port, allowing the files on the SD card to be seen on your phone.
How many photos can 64GB hold?
64GB of memory can store an estimated 17,110 photos, depending on image size and quality. A 64GB external hard drive can hold around 1.2TB of data, which includes photos and movies. The number of real photographs that may be kept in 64GB is determined on the image’s resolution and quality. Higher quality photos may use more disk space than lower resolution ones. A 16-megapixel photograph, for example, would have a substantially bigger file size than an 8-megapixel image with the same dimensions and compression method.
When considering how many photos may be stored on a 64GB external hard drive, keep in mind that other sorts of media assets, such as films or audio files, might also take up space on the drive. Use a picture optimization product to minimize file sizes while retaining quality if required to guarantee that all of your photographs fit inside this capacity.
Where can I store my iPhone photos?
There are various options for externally storing your iPhone photos. The simplest and most cost-effective method is to utilize an external hard drive, which can hold hundreds of gigabytes of data. It is also critical to examine the sort of external hard disk you will need; Solid-state drives (SSD) and hard-disc mechanical drives (HDD) are the two primary varieties. SSDs are more costly, but they provide quicker speed and higher storage. HDDs, on the other hand, have a longer lifespan and are more economical at bigger capacities.
It is advised that you utilize Time Machine backup software on your laptop or desktop computer in combination with an external hard drive for backup reasons. This will backup all of your photos every day, ensuring that you have additional copies in case your primary storage device fails. You may also save photos straight from your iPhone using a cloud storage provider such as iCloud or Google Drive. Whatever choice you use, be certain that it is safe and dependable enough to store crucial data such as photos.
Are photos backed up in iPhone backup?
When you make an iTunes backup for your iPhone, the photos you’ve shot with your device are included. The precise location of this backed up data differs based on the version of iTunes and iPhone you’re using. If you’re using an earlier version of iTunes, your backed-up photos will be in the “Camera Roll” or “Photos” folder. Your backed up photos will be found in a folder named “Mobilesync” in recent versions of iTunes.
By right-clicking on the iTunes window and choosing “Show Package Contents,” you may access your photos. When you do this, a folder with backups and programs from your iTunes library should show on your screen. Simply go to “Camera Roll” or “Photos,” depending on which version of iTunes is installed on your computer, to discover and see the photos saved in these folders.
In general, an iPhone backup made with an updated version of iTunes should contain any photos shot with your device that are still accessible on it. This does not, however, ensure that any deleted items will be included in the backup; only data saved at the time the backup was generated will be backed up.
Does backing up iPhone save photos?
Backing up your iPhone photos is an essential step in safeguarding and keeping your memories. The good news is that with the correct external hard drive or cloud storage solution, it’s simple. In a few easy steps, you may backup all of your iPhone photos to an external hard drive.
To do this, connect the external hard disk to your computer via USB first. Then, on your iPhone, open the Photos app and choose “Back Up Now” from the settings menu. When the backup is finished, you’ll be able to see all of the photos on your external hard drive. Additionally, from inside the Photos app, you may backup certain albums or individual photos. This makes it simple to back up just the photos that are most essential to you on an external hard disk.
How do I download more than 1000 Photos on iCloud?
If you want to download more than 1000 photos from iCloud to a hard drive, you’ll need to use a third-party tool. These applications make it simple for users to backup their iPhones and iPads to an external hard drive. Third-party applications are usually more dependable than the default Photos app “app in iCloud”, since they provide extra features such as folder organizing. Furthermore, they are often quicker and simpler to use than the Photos app on iCloud.
Simply follow these steps to begin downloading more than 1000 photos from iCloud using a third-party app:
- On your computer or device, download and install the required third-party program.
- Access your iCloud account.
- Choose which photos to save from iCloud to an external hard drive or other storage device.
- Click the Download button “button inside the app” and wait for it to finish before unplugging your smartphone or exiting the software completely.
Can I delete Photos from iPhone and keep on iCloud?
Yes, you can remove photos from your iPhone while still saving them to iCloud. This will let you to clear up space on your smartphone while still enabling you to view the photos when necessary.
To backup your photos to an external drive, connect the drive to your iPhone using a suitable connector and launch the Photos app. Select your preferred photographs and click the export button in the top right corner. Choose External Drive as the destination, and then wait for the operation to complete. This will guarantee that the photos you choose are safely backed up onto an external hard drive, ensuring that they are safe even if your iPhone or iCloud account is compromised.
How do I delete Photos from iPhone but not iCloud?
Deleting photos off your iPhone but not from iCloud is simple and will help you clear up space on your device. First, ensure that you have backed up all of the photos and movies you wish to save on an external hard drive.
After that, you may remove any unwanted or unnecessary photos or videos from your iPhone. Simply use the Photos app on your iPhone to do this. Then, using two fingers, pick all of the photos and videos you want to remove by touching them one by one, or by clicking the little circles at the bottom of each image to select them all at once. Once chosen, hit the trash can symbol in the bottom right-hand corner of your screen to erase them from your device alone, not from iCloud, freeing up plenty of storage space on your phone for new memories.
How do I transfer photos from camera directly to external hard drive?
Transferring photos from a digital camera to an external hard drive is a quick and easy method to backup up crucial images. To begin, connect the camera to the computer through a USB wire. Then, launch the camera software or a picture management tool such as iPhoto or Picasa.
- When the app is launched, choose the photos you want to transfer and then click “Transfer”.
- After that, connect your external hard drive and drag and drop the chosen photos onto it.
- Finally, press the “OK” button when asked.
The transfer should be complete, and you should now have a backup of your photos on an external hard disk. If you ever need to view those files fast without having to upload from your camera, this may save you time.
Can I transfer photos from camera to external hard drive?
Yes, you may quickly backup your photographs by transferring photos from your camera to an external hard disk. The procedure is basic and uncomplicated.
To connect the camera to your computer, all you need is a USB connection or memory card reader, as well as an external hard drive with enough space to retain all of the data. Then, either transfer the data directly from the camera’s memory card to the external drive or use photo management software such as Adobe Lightroom or Capture One to automatically import photographs from your camera and save them on the external drive.
After you’ve transferred all of the photographs, you may securely save them on the external hard drive for future use.
Can I use an SD card as a hard drive?
In summary, an SD card may be used as a hard disk. This may not be the ideal choice, depending on the size of the SD card and the quantity of data you need to store. An SD card is often used as a short-term storage option, particularly for modest quantities of data or files that do not need long-term storage. This is due to the ease with which an SD card may get corrupted or destroyed when utilized as a main storage device.
If you want to backup your iPhone photos to an external hard drive or any other form of material that requires long-term storage, it’s best to use an external hard drive rather than an SD card. When compared to an SD card, an external hard drive delivers more dependable data security and quicker access rates. Furthermore, external hard drives are bigger in capacity than most conventional SD cards, making them ideal for huge file backups.
What is the difference between Pictures and Photos on Mac?
Images shot or saved from the web on a Mac are saved in two locations: Pictures and Photos. Knowing the distinction between these two folders is critical when it comes to backing up these photographs.
- Photos refers to the Mac’s native Photos software, which saves photographs and videos from your iCloud account.
- Pictures, on the other hand, contains photos and movies that you have captured with your iPhone camera or uploaded from another source. It also contains any wallpapers you’ve changed for the backdrop of your Mac’s desktop.
When storing up photos from an iPhone, it is best to back up Pictures since this will contain all of the material saved on your device, including photos and movies. Meanwhile, if you simply want to back up certain albums or altered photos on your phone, you may back up Photos exclusively.
Are Apple Photos free?
Apple Photos is a free program that enables users to save and manage their photos, videos, and albums. It is compatible with macOS and iOS devices such as iPhones and iPads.
Editing tools, automatic organizing based on place, time, people, and events, safe iCloud backups for all of your photos, iCloud sharing with friends and family members, and much more are included.
Apple Photos also provides free limitless storage as long as you use the iCloud service with an Apple ID. With iCloud activated on your device, you may save an infinite number of photos in their original quality for free. This makes it an excellent choice for individuals who want to back up their photographs without purchasing an external hard drive or other forms of storage options.
How do I change my photo library location?
Changing the location of your iPhone’s picture library is a simple approach to backup your photos to an external hard drive. This may be done via the iPhone’s settings or through Apple’s iCloud Drive. You may also utilize third-party applications and services, such as Dropbox or Google Photos, to save your photos elsewhere.
To begin, go to Settings > Photos & Camera > Other Options” iCloud Photo Library on your iPhone. Toggle off “iCloud Photo Library” and then choose “Download and Keep Originals.” This allows you to save all previous photos to your smartphone. Return to Photos & Camera,” and turn on the My Photo Stream option. This will enable you to automatically store any new photos you take with your smartphone to an external hard disk.
Finally, open your preferred software (Dropbox, Google Photos, etc.) and specify where you want the iCloud photos to be saved. That’s all there is to it. You have successfully relocated your picture collection.
How do I move photos library to external hard drive Mac?
Moving your picture library to an external hard drive is a terrific method to free up space on your Mac, protect your photos and movies, and ensure you have a backup in the case of data loss. Fortunately, moving the collection is a breeze using Apple’s Photos app.
To transfer your Photos library from its present location to an external hard drive, follow these steps:
- Connect an external hard drive to your Mac.
- Launch the “Photos” application.
- From the Photos menu, choose Preferences.
- Navigate to the “iCloud” menu, then to “Optimize Mac Storage” or “Download Originals to This Mac.”
- At the top of the window, check the “Use as System Photo Library” box.
- Choose between two choices:
- Pick Library, then go search and select the photos you wish to transfer or delete from the left side panel picture library.
- Drag and drag a picture library from the Finder into an empty area adjacent to the left sidebar in the Photos app window.
- It will now ask whether you want to remove the previous version or not; choose Delete and then click the Choose Library icon in the bottom right corner.
When finished, you should see all of the photos on your external hard drive in the Photos app. As a precaution, always back up all of your photos as soon as possible to avoid losing any treasured memories.
Does Mac Time Machine backup photos?
Yes, you can backup photos from your iPhone to an external hard drive using Mac Time Machine. When you first install Time Machine, you are asked whether you want it to back up your photos as part of the automatic backup process. If you choose yes, it will back up all of the photos on your iPhone on a regular basis.
It’s vital to note that this procedure necessitates the use of a Mac computer as well as an external hard disk. Before it can be used with Time Machine, the external hard disk must be formatted for macOS extended Journaled. Connect the external drive to your Mac after it has been properly formatted, then open System Preferences and pick Time Machine” from the choices available to finish the setup procedure.
When finished, any photos shot on your iPhone will be automatically backed up on a regular basis as long as both devices are linked.
Why cant I save files to my external hard drive Mac?
Saving files to an external hard drive on a Mac may be a difficult task since macOS is constructed with the assumption that the user would store their material on the computer’s internal hard disk. To save data to an external hard drive, first create a folder and then drag and drop your files into it.
The most frequent reason why users can’t save files to their external hard drive is because the disk has been formatted. To support file transfers between internal and external drives, macOS normally needs an HFS+ or APFS format. If your external hard drive is not formatted in one of these two formats, you must reformat it before using it with your Mac.
Another typical reason why users are unable to store files on their external HDD is a lack of permissions or available space on the device. In these circumstances, confirm that your account has enough rights to read and write to the HDD, as well as that there is enough free space on the HDD for your anticipated data transfers.